Cylinder head Removal
I have now set about removing the head and I am hoping that the local engineer will be able to remove the broken bolt and tap from the head using a machine called Spark errosion this basically uses electric pulses which cause the metal to turn to dust it is then flushed away with coolant during the process,I am told that it dosent damage the head.
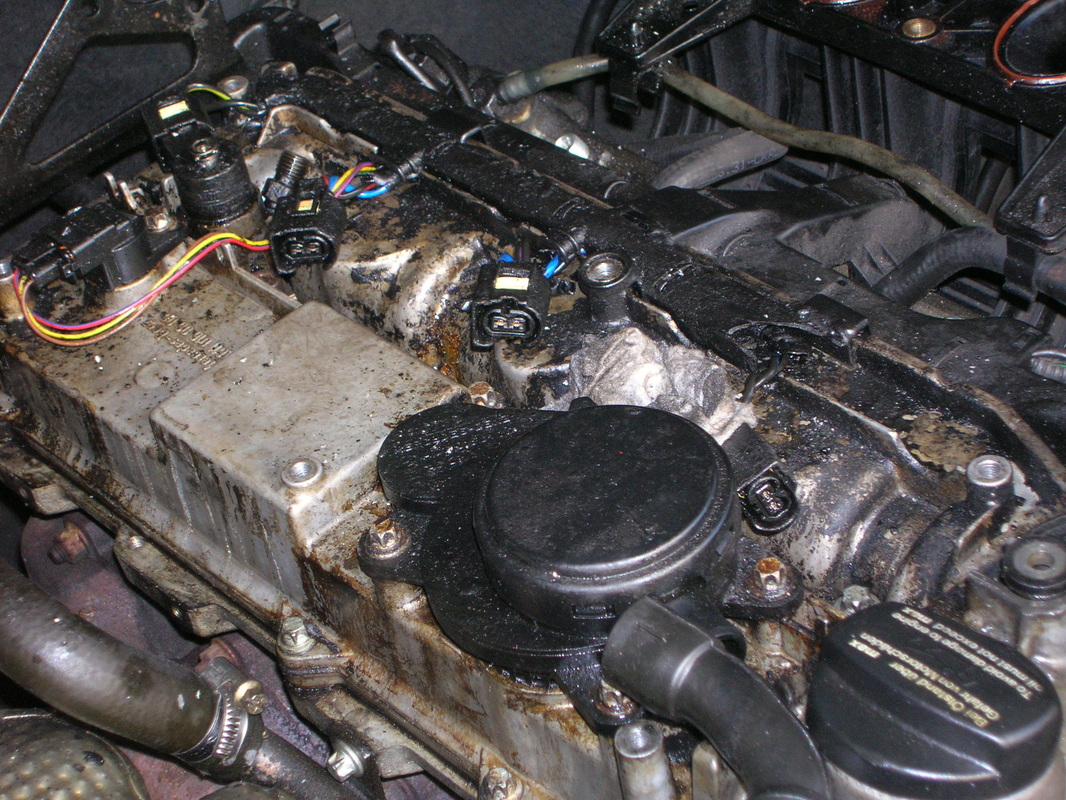
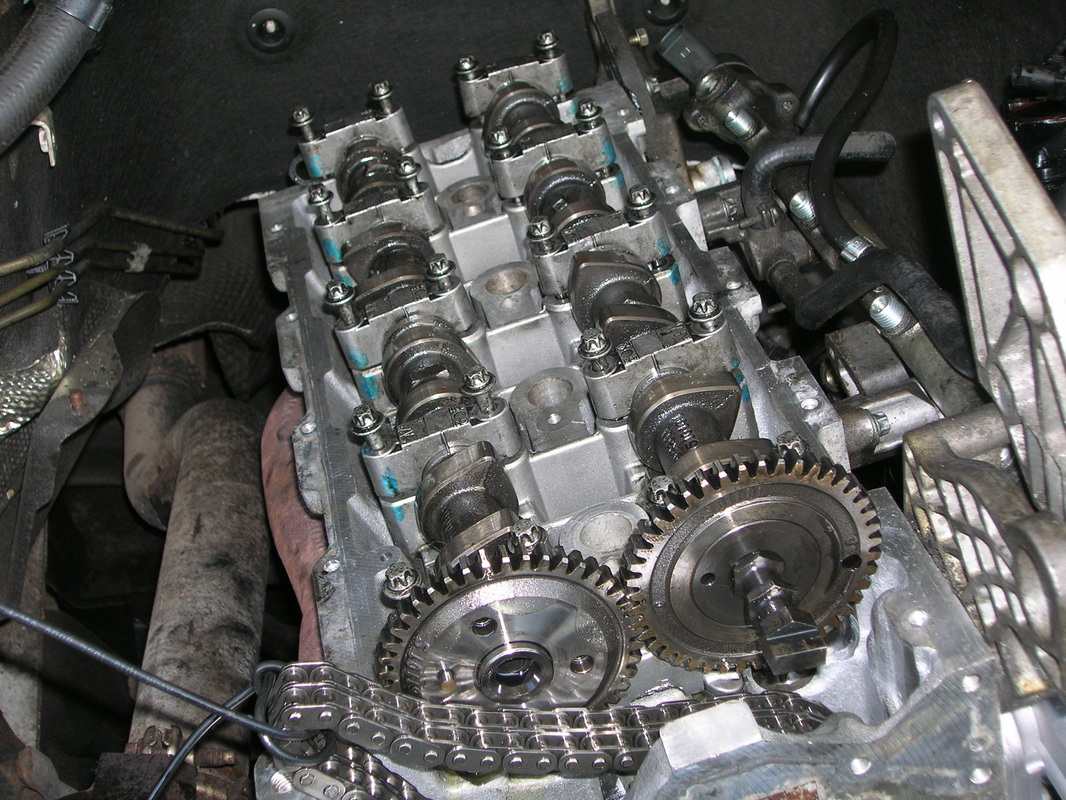
So off with the head all of the wiring and inlet manifold have to be removed and left at one side ,all the injectors have been removed this allows access to the rocker cover which needs to be unbolted giving access to the camshafts and timing chains .
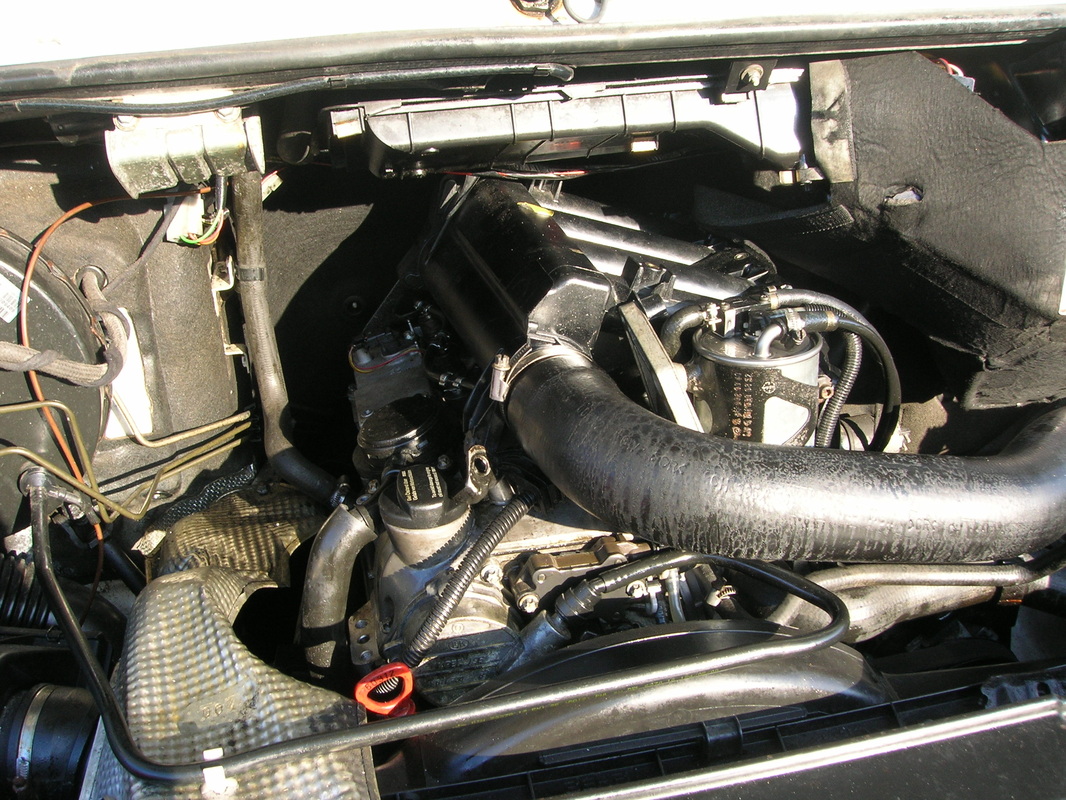
The front panel and radiator and intercooler need to be removed this all comes away in one go giving acess to the front of the van ,removal of the high pressure fuel pump and pipework then allows acess to the cam chain sprocket which needs to be removed when the engine has been timmed up.
I have now set about removing the head and I am hoping that the local engineer will be able to remove the broken bolt and tap from the head using a machine called Spark errosion this basically uses electric pulses which cause the metal to turn to dust it is then flushed away with coolant during the process,I am told that it dosent damage the head.
So off with the head all of the wiring and inlet manifold have to be removed and left at one side ,all the injectors have been removed this allows access to the rocker cover which needs to be unbolted giving access to the camshafts and timing chains .
The front panel and radiator and intercooler need to be removed this all comes away in one go giving acess to the front of the van ,removal of the high pressure fuel pump and pipework then allows acess to the cam chain sprocket which needs to be removed when the engine has been timmed up.
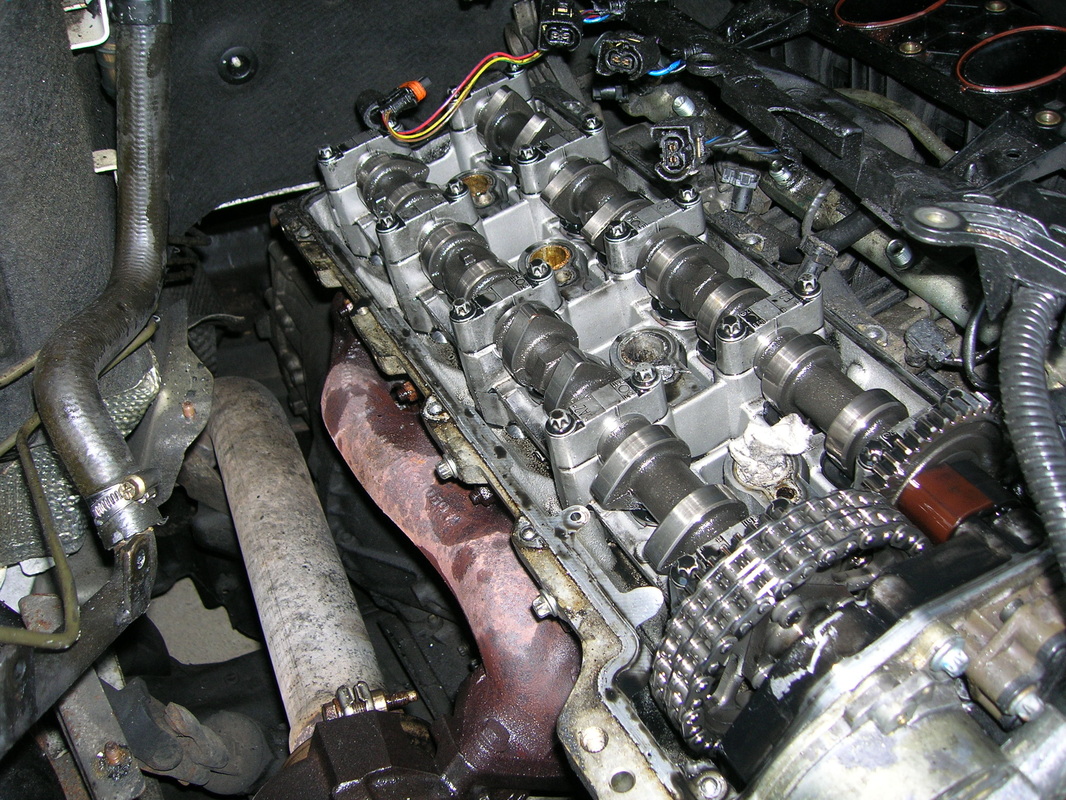
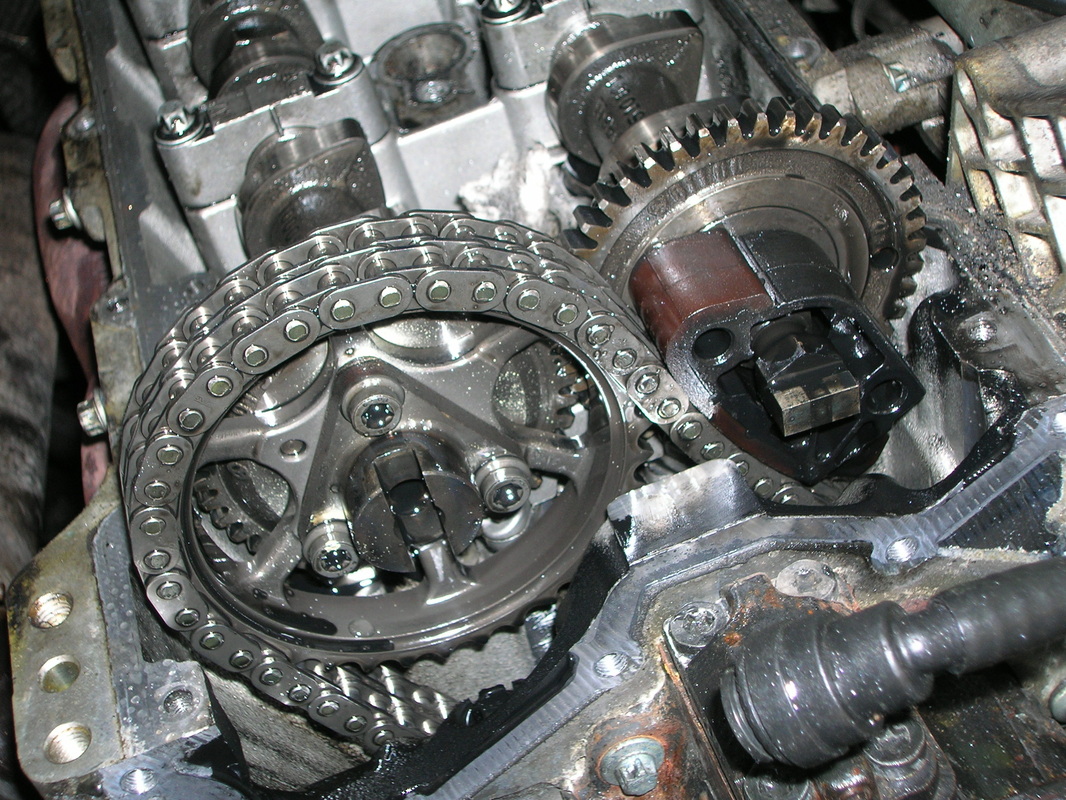
Timing the engine up correctly is a must otherwise damage to the camshafts may occur two small dots line up on the cam sprockets and 2 dots on the cams line up to the cam bearing caps.On the crank pully the main large mark should now be lined up ,after removing the tensioner on the side of the engine you can remove the cam pully and chain off the camshafts .
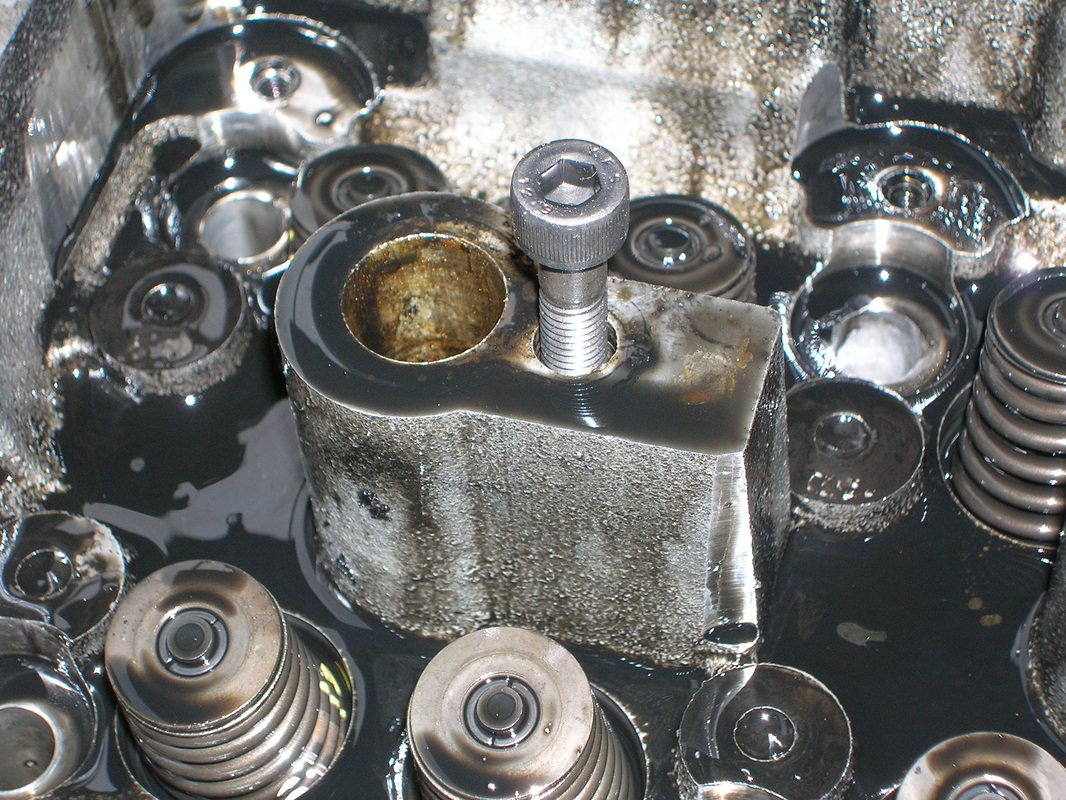
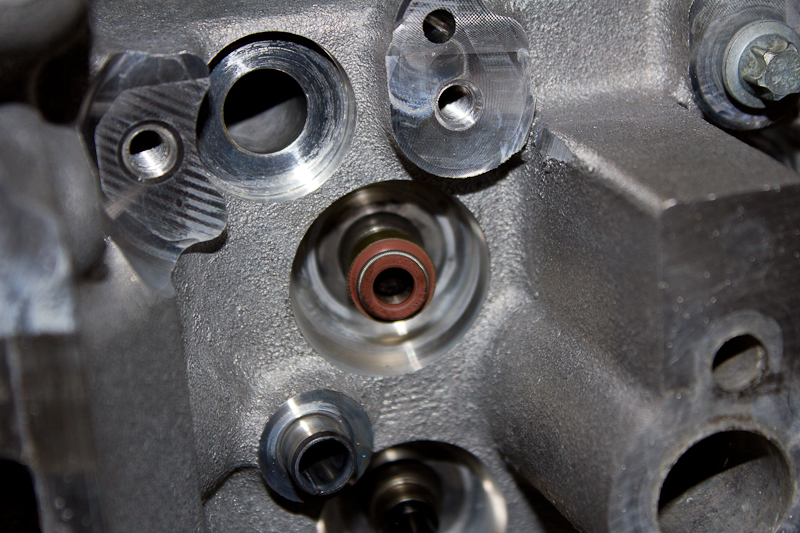
Removing the camshafts and tappet block will now give access to the head bolts ,but before this you need to remove the lower chain sprocket from the head.
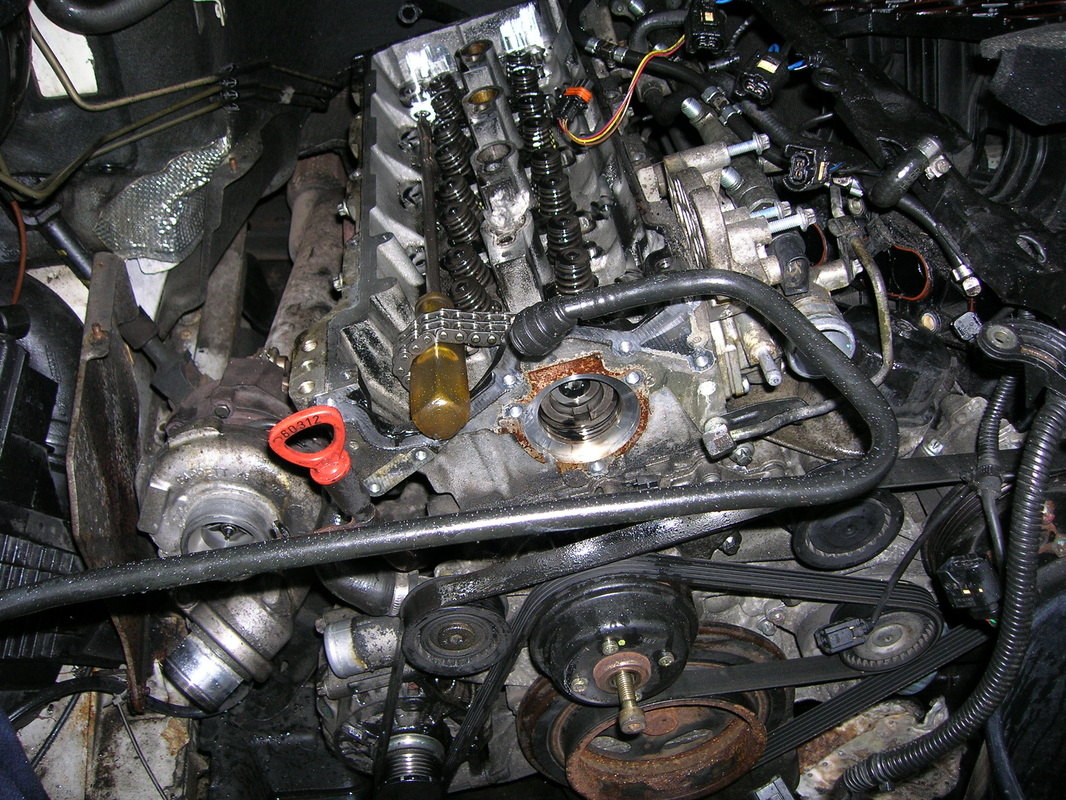
The Head bolts are a Female Torx Socket E18 and are very tight as I found out when the socket and bar I was using broke and I nearly broke my wrist .
Now the cylinder head can be removed but I made sure the chain was supported so there was no chance it dropped off the crank sprocket .
Once off the van all the little bits were removed and it was made ready for the engineers .
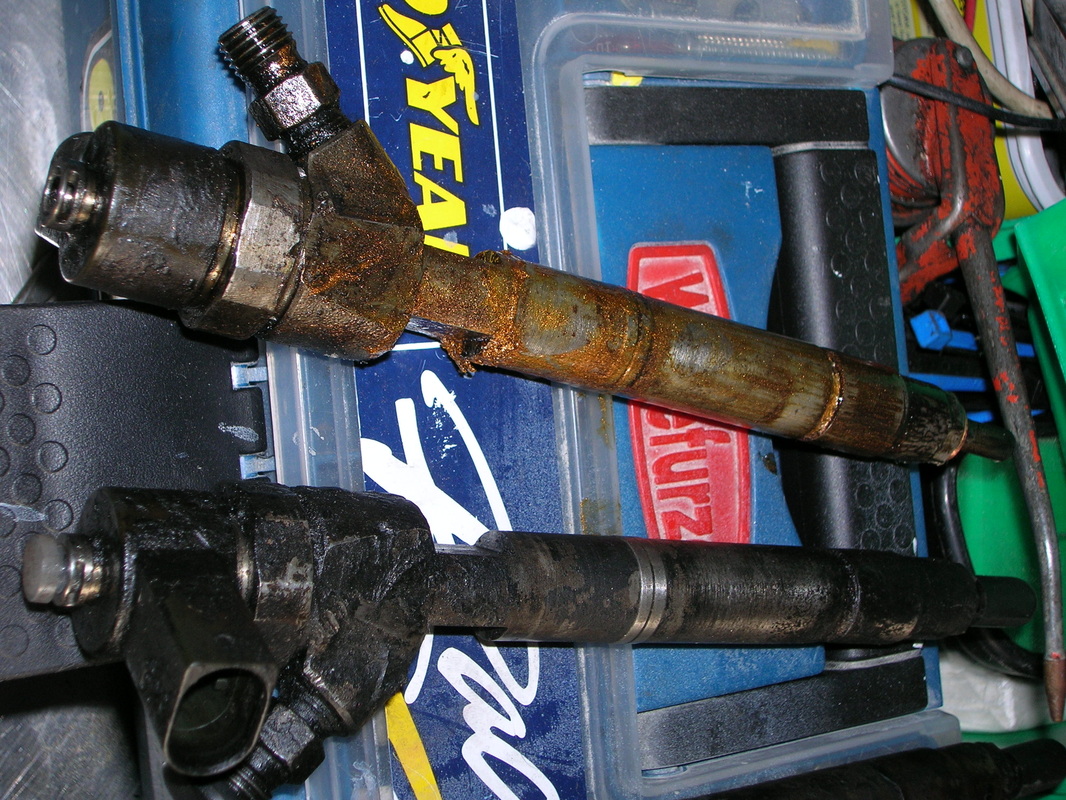
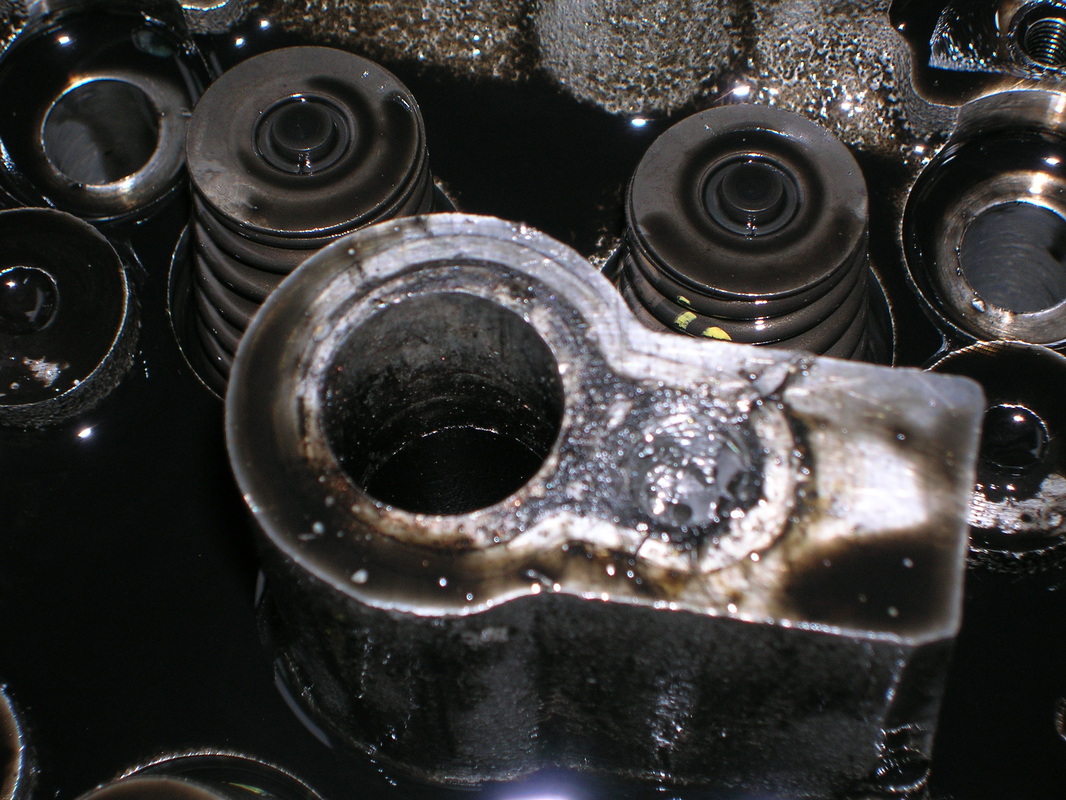
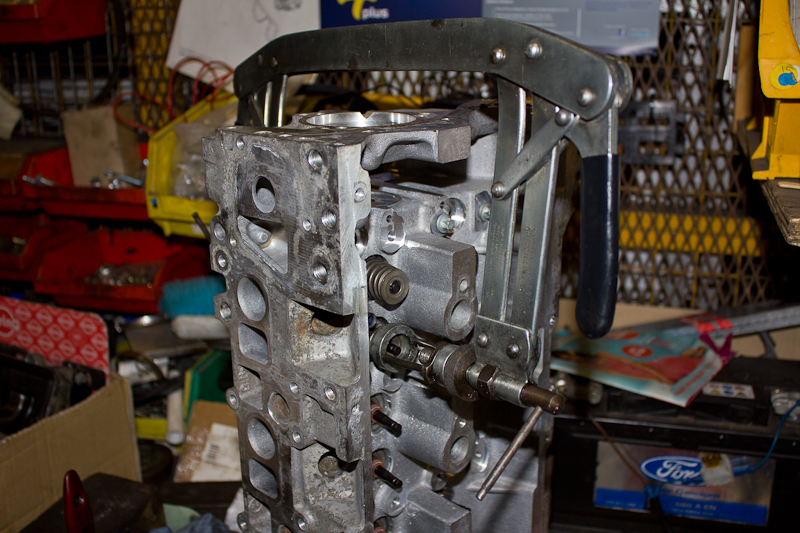
You can see the broken bolt in the pictures ,just hope they can remove it so I don't end up having to get a new cylinder head .
Removing the camshafts and tappet block will now give access to the head bolts ,but before this you need to remove the lower chain sprocket from the head.
The Head bolts are a Female Torx Socket E18 and are very tight as I found out when the socket and bar I was using broke and I nearly broke my wrist .
Now the cylinder head can be removed but I made sure the chain was supported so there was no chance it dropped off the crank sprocket .
Once off the van all the little bits were removed and it was made ready for the engineers .
You can see the broken bolt in the pictures ,just hope they can remove it so I don't end up having to get a new cylinder head .
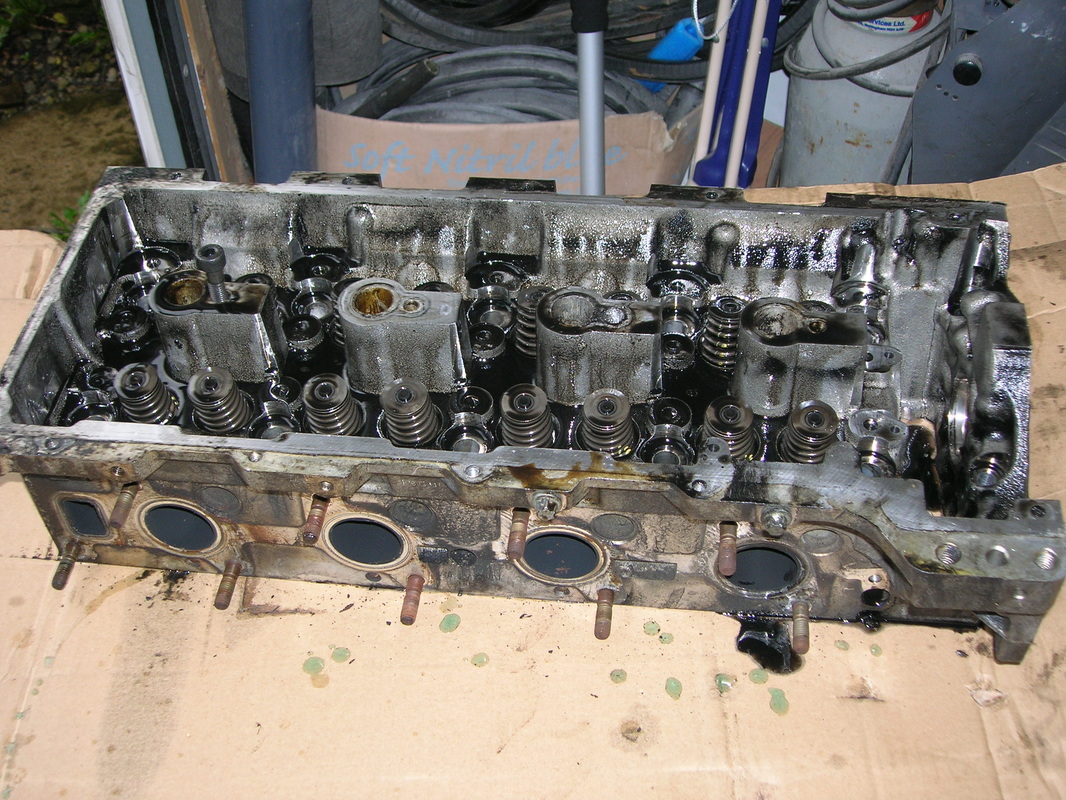
The head is now away at the engineers and should return in a few days they seem to think they can repair it and are going to helicoil the rest to M8 .
January 2012
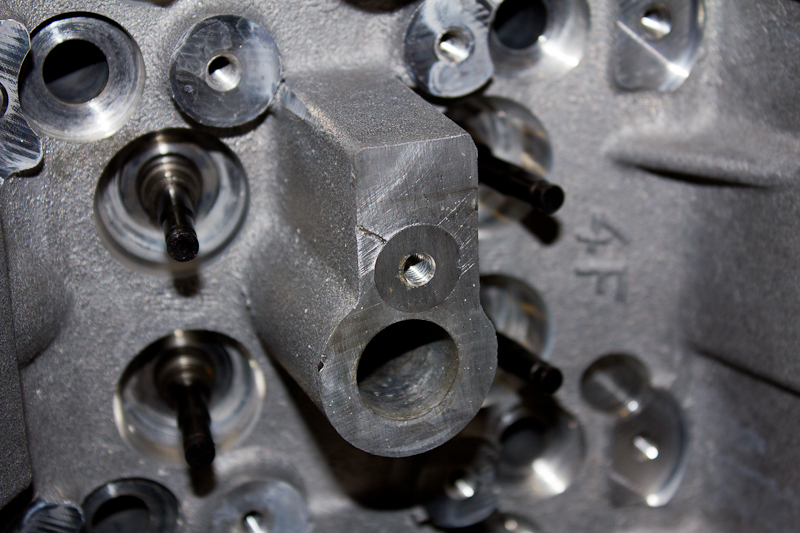
Well time for an update again ,the head was away at the engineers a bit longer than a few days as it turned out to be a bigger job than first thought ,they managed to remove the broken tap using spark erosion , but who ever had originally tried to drill it out had made a bit of a mess so a decision was made to drill out a lot bigger then tap and fit a stainless insert into the pillar for the injector this was then drilled and tapped for the injector clamp bolt .
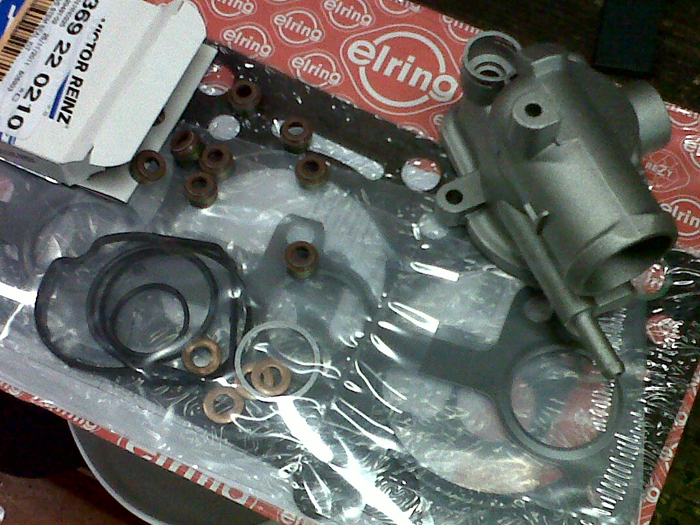
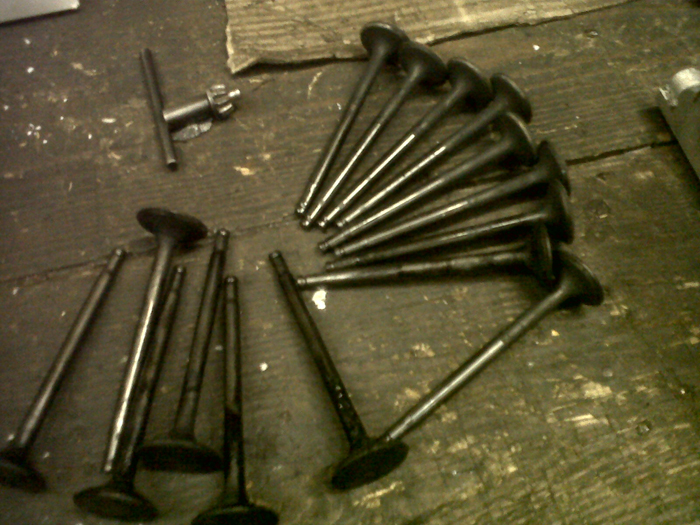
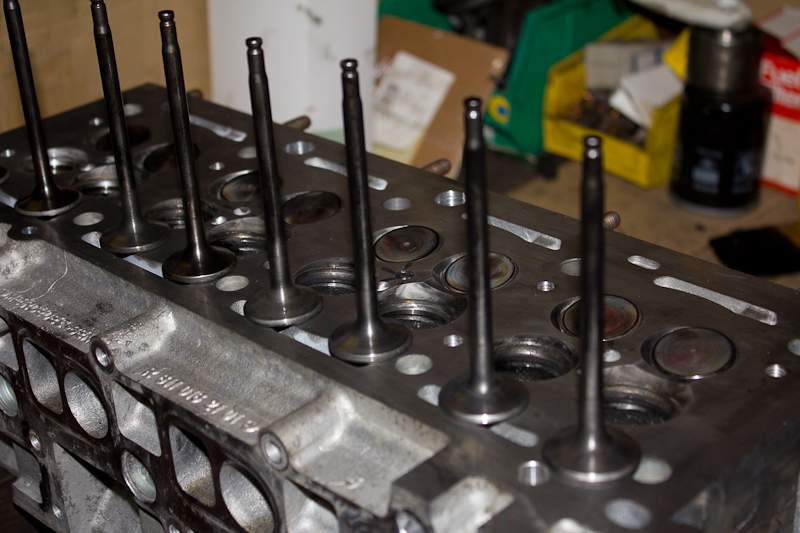
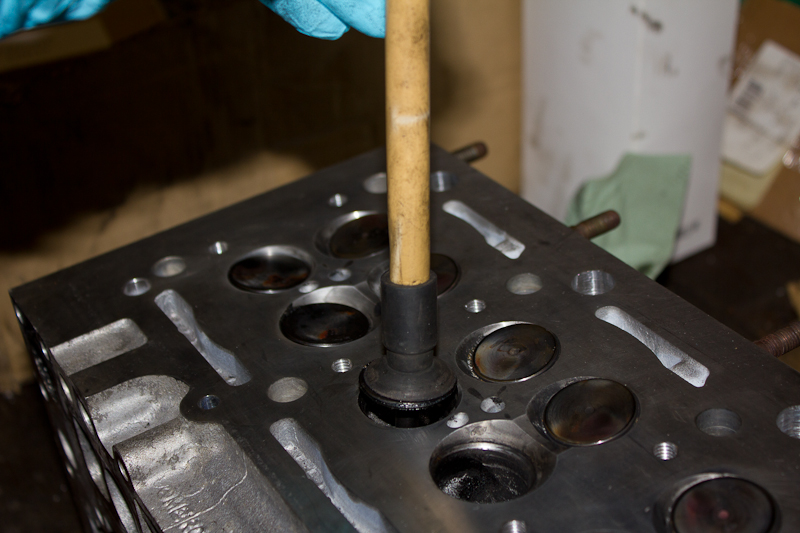
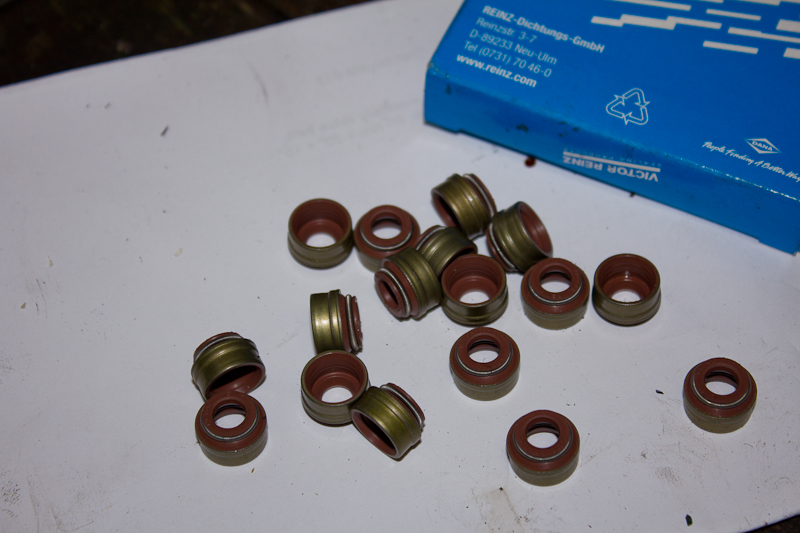
The head came back the first week of January so while it was stripped down I sent it to the Local engine builder to have it Pressure tested and skimmed ,it didn't seem much point in going to all this trouble to not have it skimmed . Paul at Engine Tekniks did a fantastic job and knows his stuff the head came back with no problems so all the valves have been cleaned off and lapped into the head ,new valve stem oil seals have been fitted. I have fitted a new thermostat on the sprinter these come already assembled in a new housing and are quite expensive for what they are this will cure the heater going cold at times
January 2012
Well time for an update again ,the head was away at the engineers a bit longer than a few days as it turned out to be a bigger job than first thought ,they managed to remove the broken tap using spark erosion , but who ever had originally tried to drill it out had made a bit of a mess so a decision was made to drill out a lot bigger then tap and fit a stainless insert into the pillar for the injector this was then drilled and tapped for the injector clamp bolt .
The head came back the first week of January so while it was stripped down I sent it to the Local engine builder to have it Pressure tested and skimmed ,it didn't seem much point in going to all this trouble to not have it skimmed . Paul at Engine Tekniks did a fantastic job and knows his stuff the head came back with no problems so all the valves have been cleaned off and lapped into the head ,new valve stem oil seals have been fitted. I have fitted a new thermostat on the sprinter these come already assembled in a new housing and are quite expensive for what they are this will cure the heater going cold at times
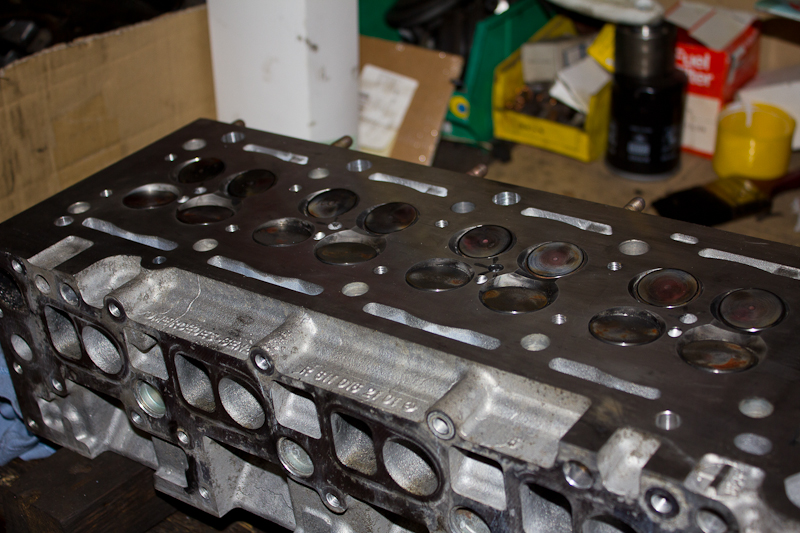
The head is now all built up and all the bits needed for refitting have been fitted back onto it ,whilst fitting the fuel rail back on the head I changed the seals in the fuel rail pressure sensor as these are a common failure which leads to a none start situation the cost of the seal kit from mercedes was £3.50 deffinatly worth doing much easier to fit on the bench .
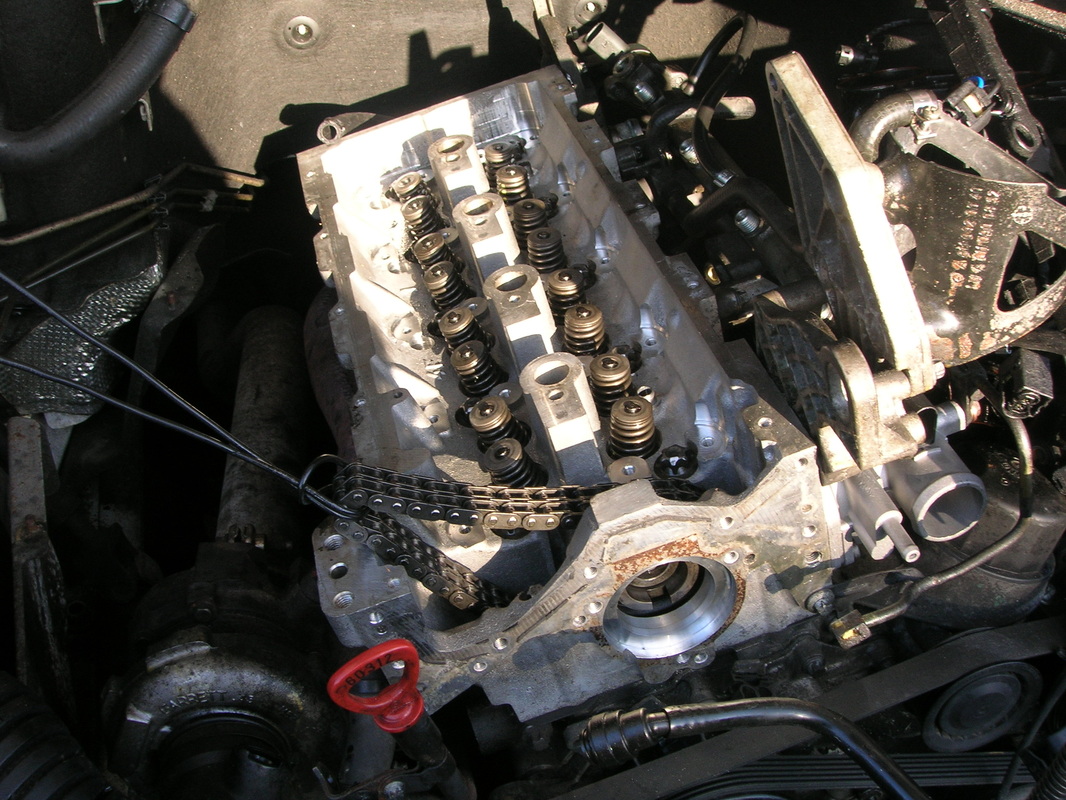
The heads now been refitted and torqued down the head bolts were measured and were within tolerance so were tightened down to 20 then 60 Newton meters with two 90 degree turns the two small M8 front head bolts need to be tightened to 20 Nm and then its then the job of fitting all the bits back on and hopefully remembering were they all go !!!!
Well the head was refitted over the weekend both cams and tappets were then fitted ,this allowed the chain to be put back on and the valve timing to be set up. A couple of turns of the engine to check no valve contact and then a big push to fit exhaust manifold and inlet manifolds,once theses were done it was a case of refitting the high pressure fuel pump and all the pipework .
The radiator and front panel was then fitted all the hoses reconnected and then I refilled it with antifreeze .Once the rocker cover had been put back on it was time to refit the injectors ,I got new stretch bolts from Mercedes and fitted each injector with a new copper washer the tightening torque for these is 9Nm then 90 degrees that's it no more or you risk snapping the bolt or stripping the thread in the head .
Getting to the point were it was time to try and start it after priming the fuel filter and fuel rail I cranked the van it took a while to start as it built the compression up but it burst into life and sounded very nice no signs of smoke from the exhaust so I let it get warm on tick over and made sure the heater was warm ,A quick check around the injectors showed no signs of leaking so fingers crossed I wont be taking the head off again for a while .
Toilet Upgrade
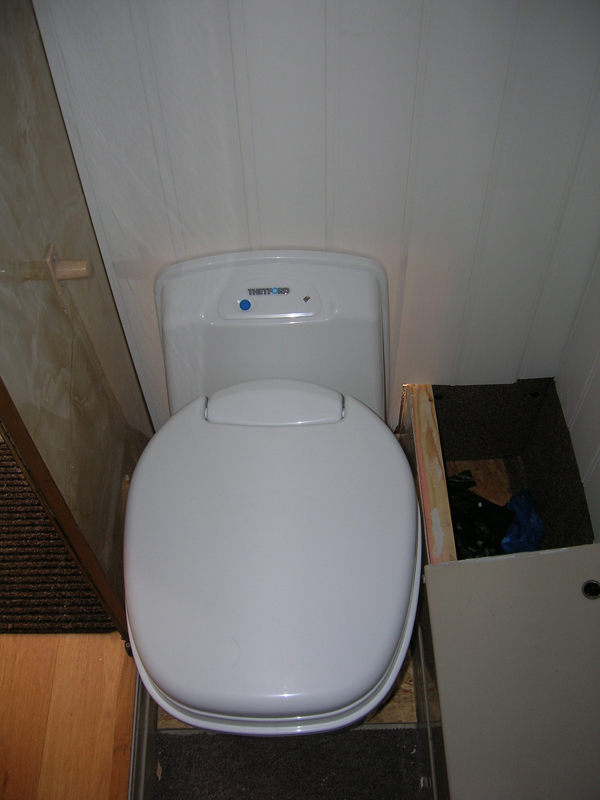
we have decided to fit an new toilet and have choose the Thetford swivel bowl type the one we got has an electric flush and uses the vans fresh water tank for flush water lucky we fitted a large tank , as its a fixed unit I have had to modify the rear bathroom panel to fit it ,we are planning to move the sink and make a new vanity unit but this is a job for a later date .
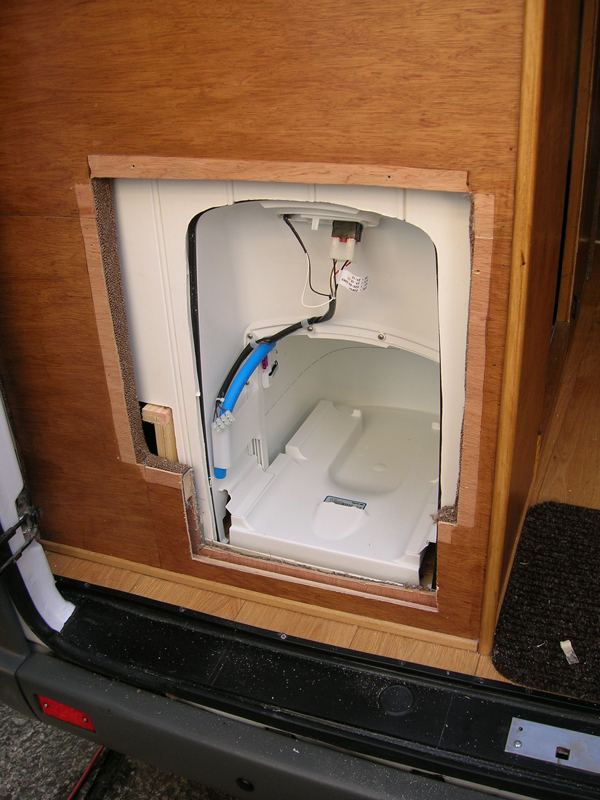
With the old toilet removed we used the template supplied and worked out were it was going we choose to have it emptying through the back of the van like the previous one so will be able to use the old door .
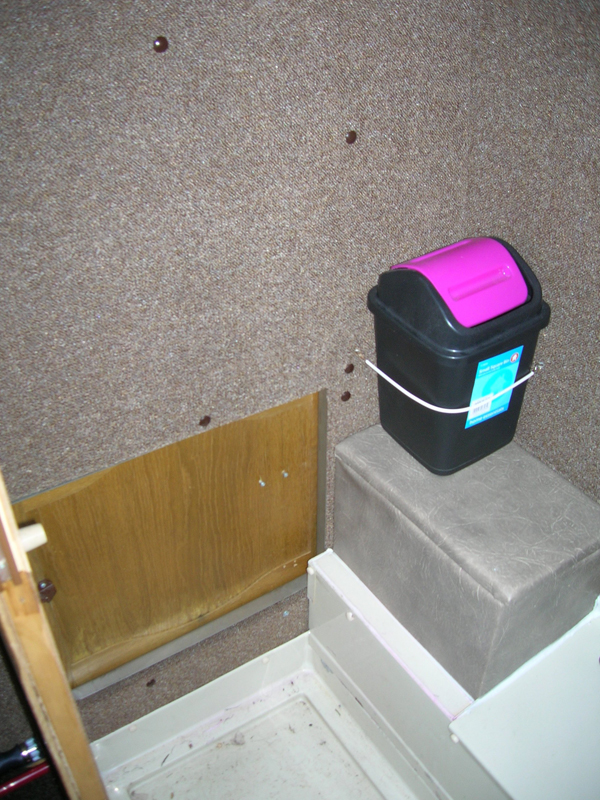
A trip to B&Q for some upvc tong and groove and some finishing strips, after working our were we wanted the strips to finish I cut them all to length ,I made a solid base in the bottom of the shower tray for the toilet to sit on ,this will be covered with vinyl floor tiles as it makes it easier to keep clean .
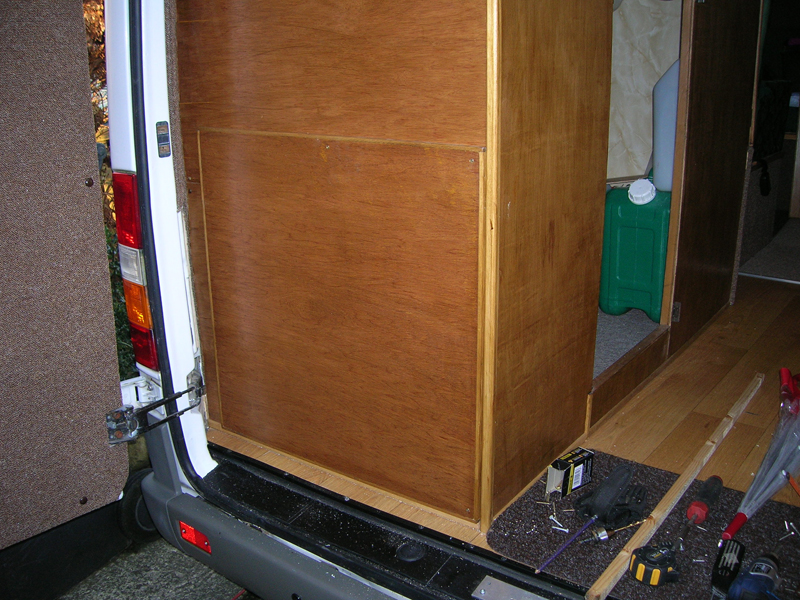
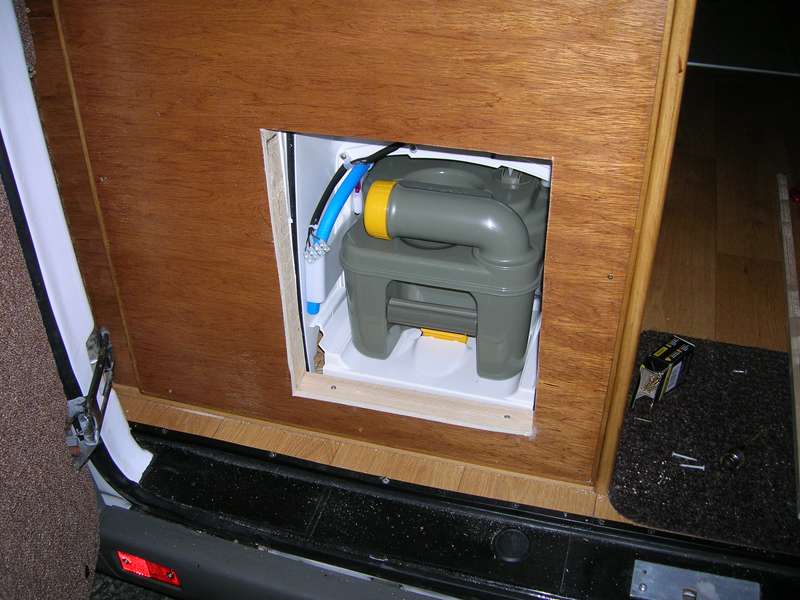
A trial fit of the toilet and then it was time to cut the hole for the cassette so we can remove it ,the upvc is easy to cut and this didn't take long to do .
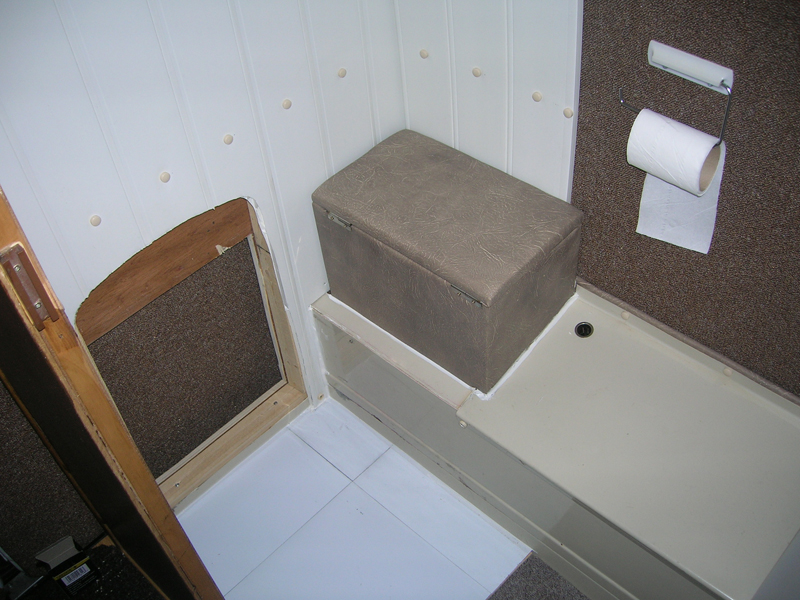
Next job was to make a new panel to cover over the old hole in the bathroom , and then cut the new panel to allow us to remove the cassette and fit the door .I have made this panel so it can be removed if we ever need to get to the pipework at any time. All that remains now is to connect it up to the tank this will be done when the frost has gone .
we have decided to fit an new toilet and have choose the Thetford swivel bowl type the one we got has an electric flush and uses the vans fresh water tank for flush water lucky we fitted a large tank , as its a fixed unit I have had to modify the rear bathroom panel to fit it ,we are planning to move the sink and make a new vanity unit but this is a job for a later date .
With the old toilet removed we used the template supplied and worked out were it was going we choose to have it emptying through the back of the van like the previous one so will be able to use the old door .
A trip to B&Q for some upvc tong and groove and some finishing strips, after working our were we wanted the strips to finish I cut them all to length ,I made a solid base in the bottom of the shower tray for the toilet to sit on ,this will be covered with vinyl floor tiles as it makes it easier to keep clean .
A trial fit of the toilet and then it was time to cut the hole for the cassette so we can remove it ,the upvc is easy to cut and this didn't take long to do .
Next job was to make a new panel to cover over the old hole in the bathroom , and then cut the new panel to allow us to remove the cassette and fit the door .I have made this panel so it can be removed if we ever need to get to the pipework at any time. All that remains now is to connect it up to the tank this will be done when the frost has gone .