Update 2013
well thought it was about time I updated the site its been a while since I did .
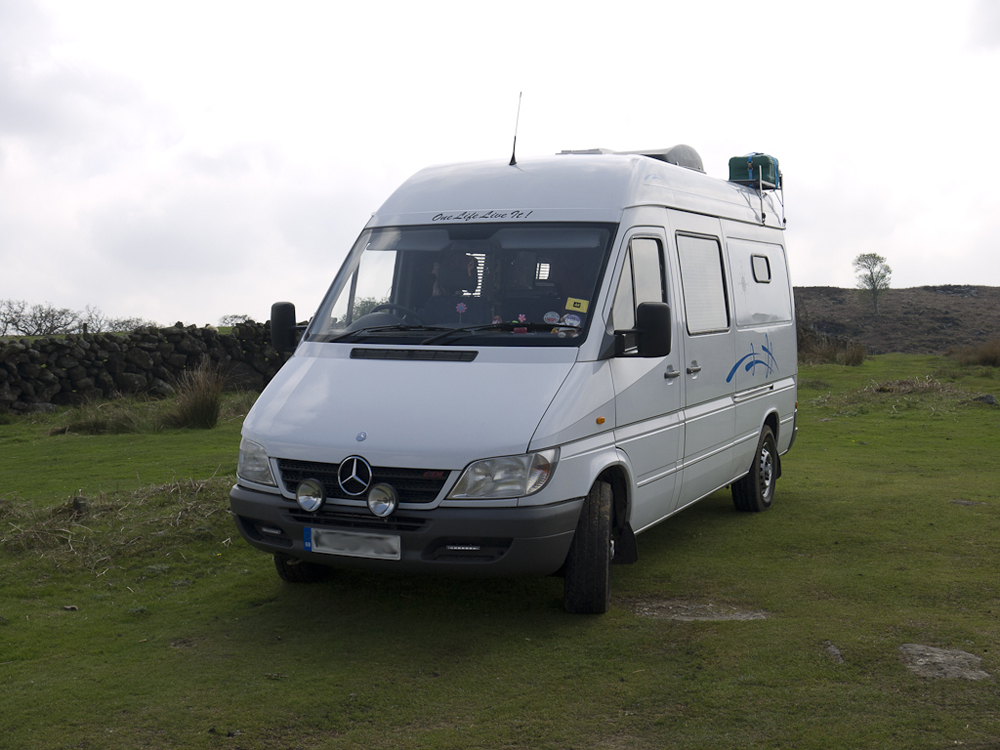
With one thing or another there hasn't been much to report over the winter months I removed the bonnet and stripped off the old paint and gave it a new coat of Artic White,as the the old paint job I did 2 years ago had started to loose its shine and I couldn't get it to buff back up I think its probably due to using a 1k enamel paint . The bonnet looks good now trouble is its showing up the other bits of paint work now .
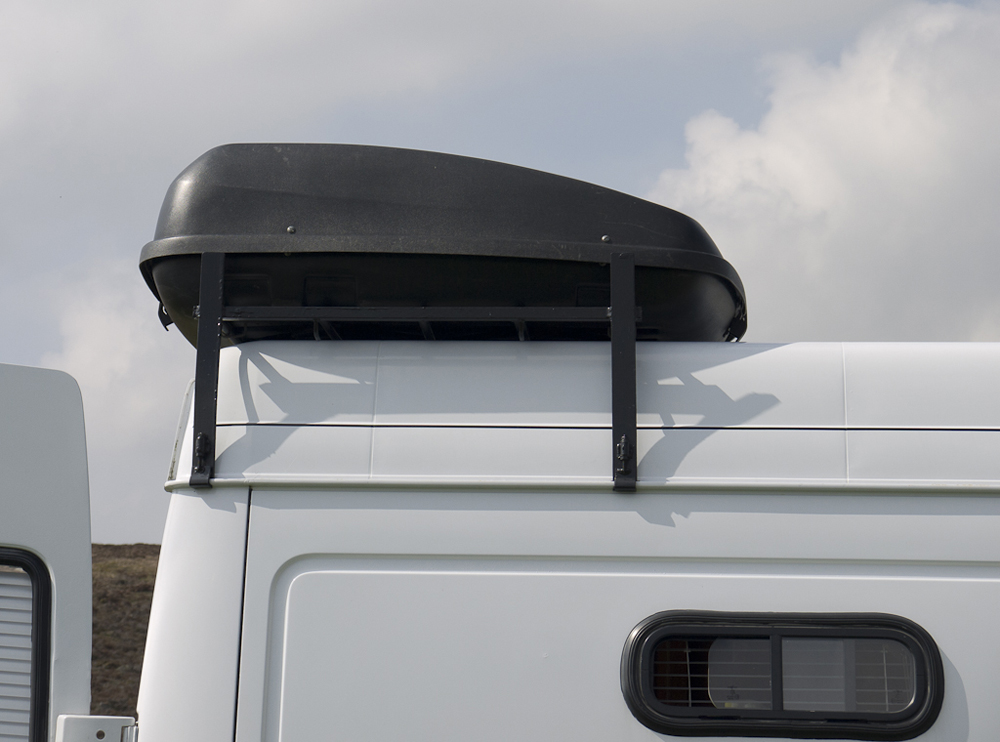
Roof Rack & Ladder
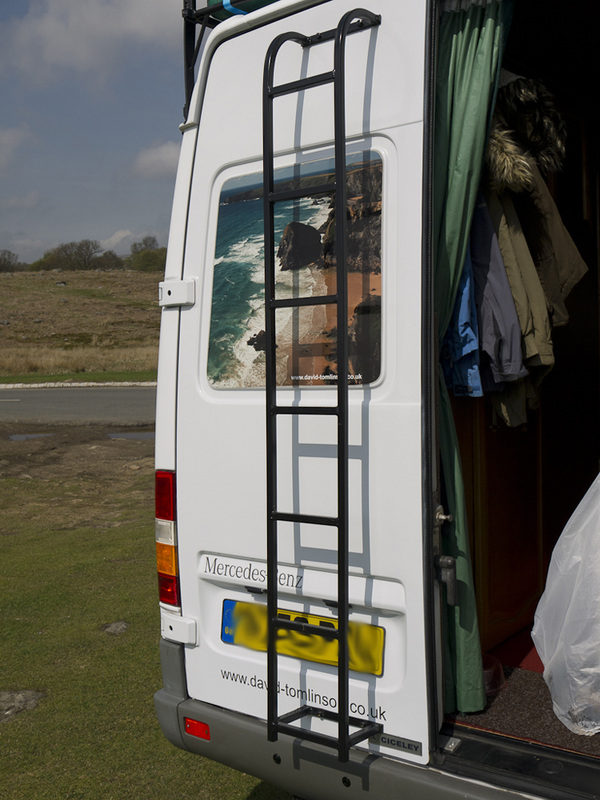
A few weeks ago I acquired a rear door ladder and full roof rack trouble was it was off a high roof Transit ,so has had to be modified to fit , I wanted to use my old roof box for extra storage so didn't need a full length roof rack ,I decided that a small section on the rear was fine so measured the length of the roof box and cut the rack accordingly , After a few trial fittings I managed to get it how I wanted it so painted it black and then fitted it along with the roof box .
The ladder took a little longer and needed one rung taking off the bottom and the mounting bracket re welding back on , this was painted in hammerite black and fitted to the rear door . there is enough room to also fit our waste water bottle and fresh water up on the roof a well so its not cluttering the inside of the van up and will come in handy when we go to Scotland later this next month .
With one thing or another there hasn't been much to report over the winter months I removed the bonnet and stripped off the old paint and gave it a new coat of Artic White,as the the old paint job I did 2 years ago had started to loose its shine and I couldn't get it to buff back up I think its probably due to using a 1k enamel paint . The bonnet looks good now trouble is its showing up the other bits of paint work now .
Roof Rack & Ladder
A few weeks ago I acquired a rear door ladder and full roof rack trouble was it was off a high roof Transit ,so has had to be modified to fit , I wanted to use my old roof box for extra storage so didn't need a full length roof rack ,I decided that a small section on the rear was fine so measured the length of the roof box and cut the rack accordingly , After a few trial fittings I managed to get it how I wanted it so painted it black and then fitted it along with the roof box .
The ladder took a little longer and needed one rung taking off the bottom and the mounting bracket re welding back on , this was painted in hammerite black and fitted to the rear door . there is enough room to also fit our waste water bottle and fresh water up on the roof a well so its not cluttering the inside of the van up and will come in handy when we go to Scotland later this next month .
Front Ball Joints
Well the time had come to change the front ball joints they had some lift in them which was advised on in the Mot so thought it was a good idea to change them before we went away to Scotland ,I suppose I'm quite lucky that I have done this job many times before so knew what to expect as the company I work for has a large fleet of Sprinters .
The next section shows how it was done ,please be aware this is not a job to be taken on if you havent got access to a press to push the joint out .
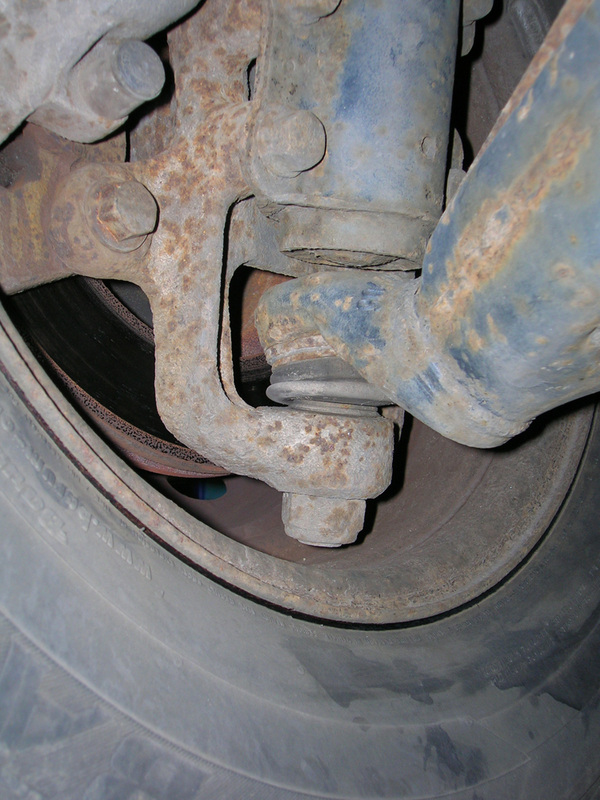
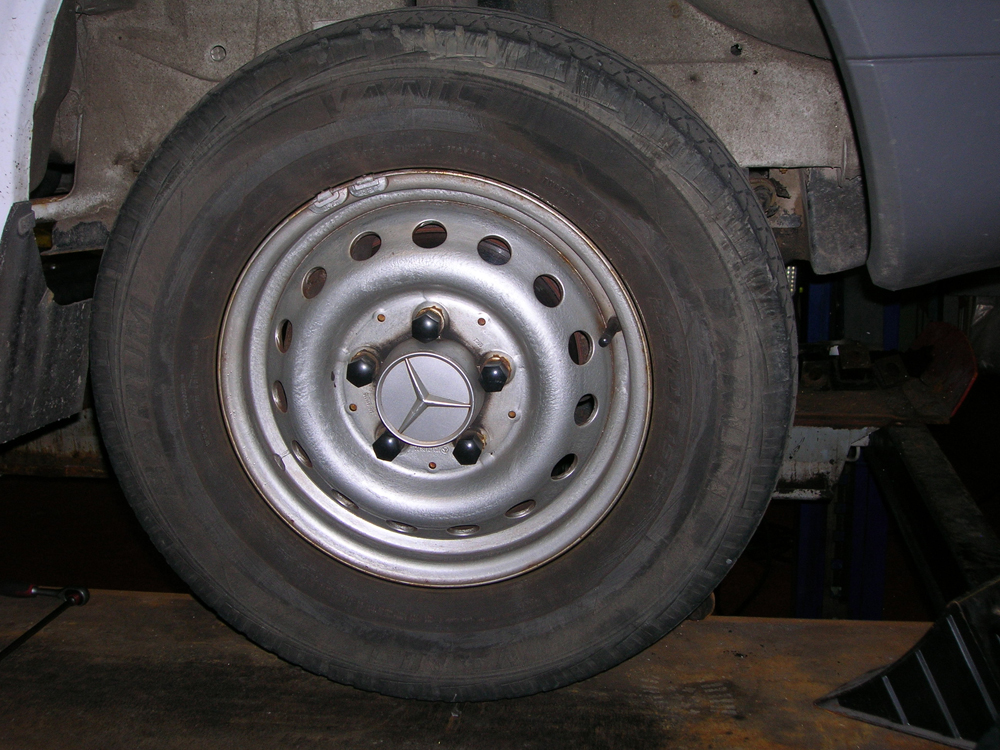
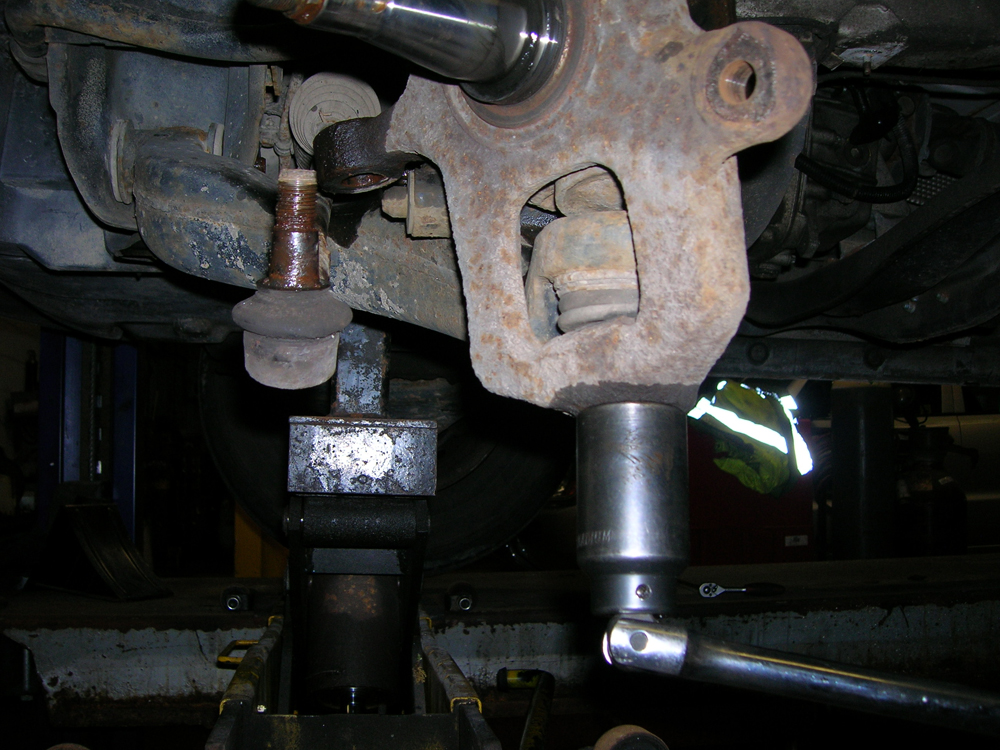
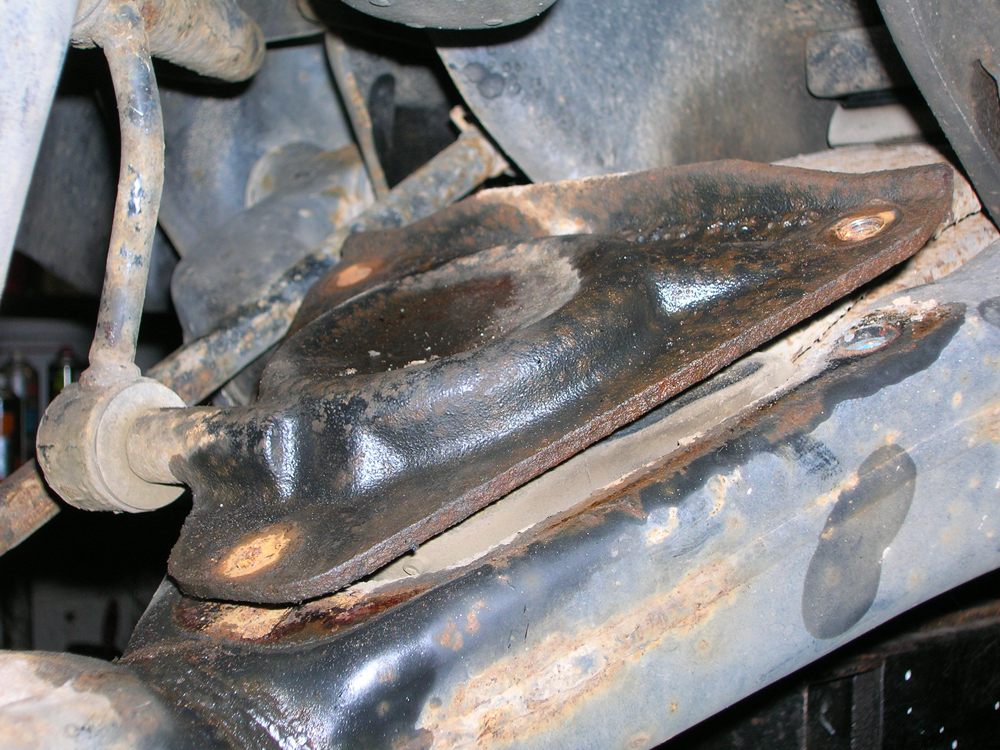
To check for play in the joint you need to jack up the lower arms to take the weight off the joints , I use a heel bar under the wheel and also in between the bottom of the suspension leg and lower arm to work the play ,you need to check for lift and also kick out mine had got quite a lot of lift so it was time to remove them .
You need to support the vehicle on stands but need to allow the lower arms to hang down otherwise you wont be able to remove the lower arms .
The next section shows how it was done ,please be aware this is not a job to be taken on if you havent got access to a press to push the joint out .
To check for play in the joint you need to jack up the lower arms to take the weight off the joints , I use a heel bar under the wheel and also in between the bottom of the suspension leg and lower arm to work the play ,you need to check for lift and also kick out mine had got quite a lot of lift so it was time to remove them .
You need to support the vehicle on stands but need to allow the lower arms to hang down otherwise you wont be able to remove the lower arms .
Once the vehicle is supported on stands you can then begin to remove the front wheels ,this will now allow access to remove the brake caliper and slide bracket this is then held out of the way ,I put it behind the bump stop so it wasnt hanging on the brake hose .
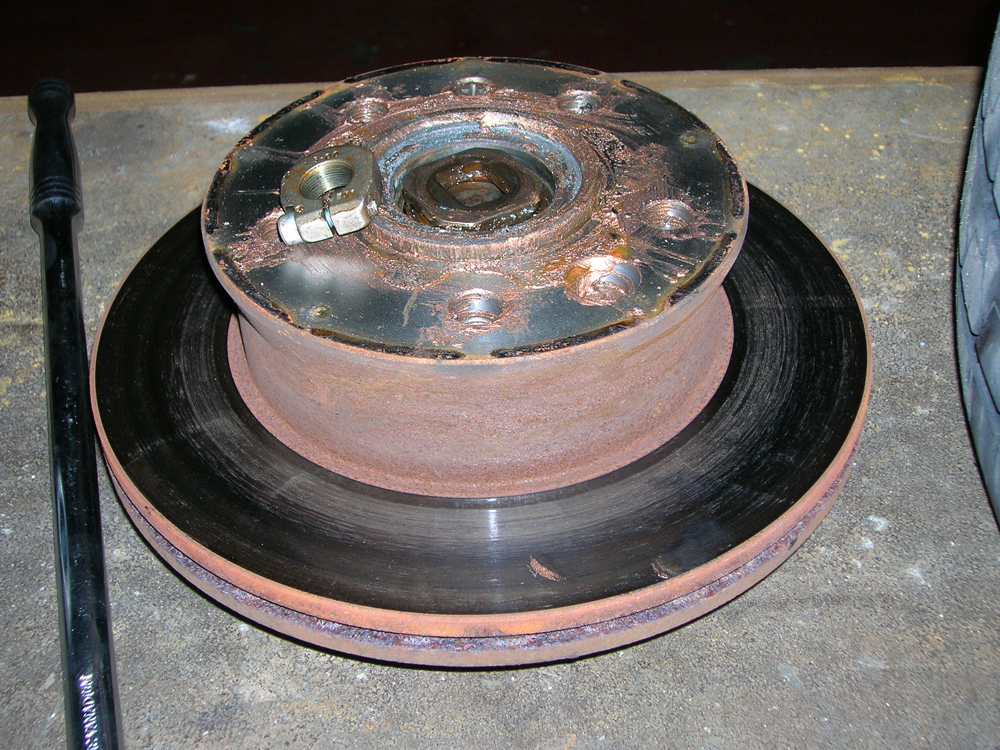
You now need to remove the front hub dust cover and proceed to remove the hub and disc ,this is done by slackening the allen bolt and removing the hub nut ,the disc and hub come off in one unit .you are now left with the stub axle to remove .
You now need to remove the front hub dust cover and proceed to remove the hub and disc ,this is done by slackening the allen bolt and removing the hub nut ,the disc and hub come off in one unit .you are now left with the stub axle to remove .

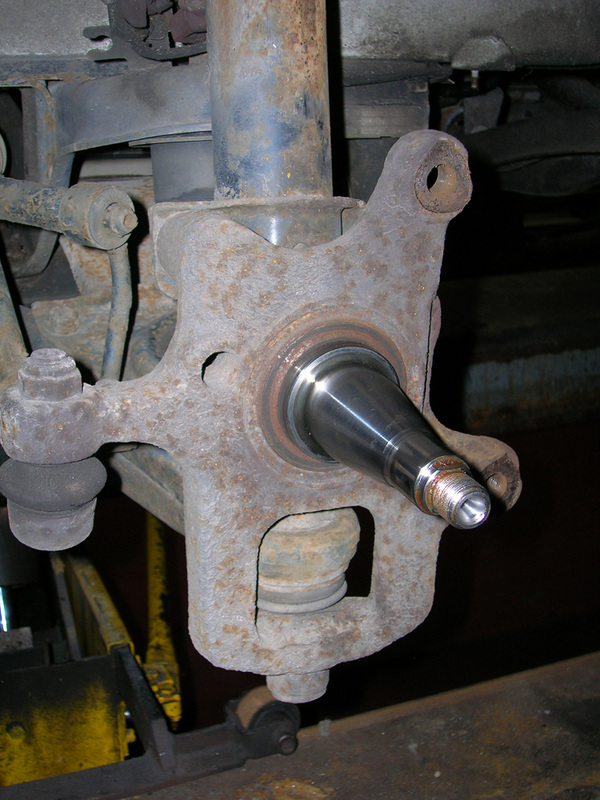
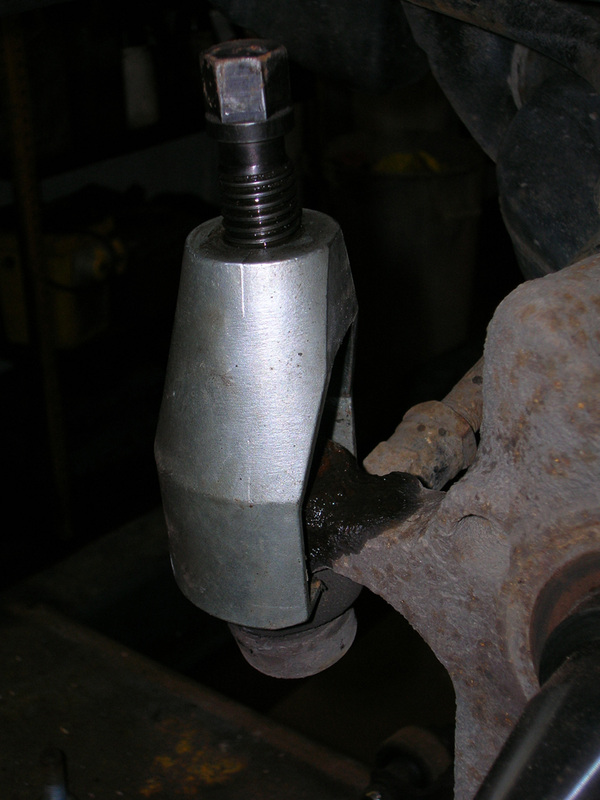
Your next step is to remove the track rod end and the bottom ball joint ,I am lucky here as I had access to the official Mercedes tools to do the job ,they can be hard to remove without the correct splitter .
once the joints have been freed off I then remove the four bolts which hold it to the suspension leg and then remove it out of the way ( if you have ABS you will see that the sensor is in the hub so will need to loosen the cable to allow it to come out of the way enough to get the arm off ) .
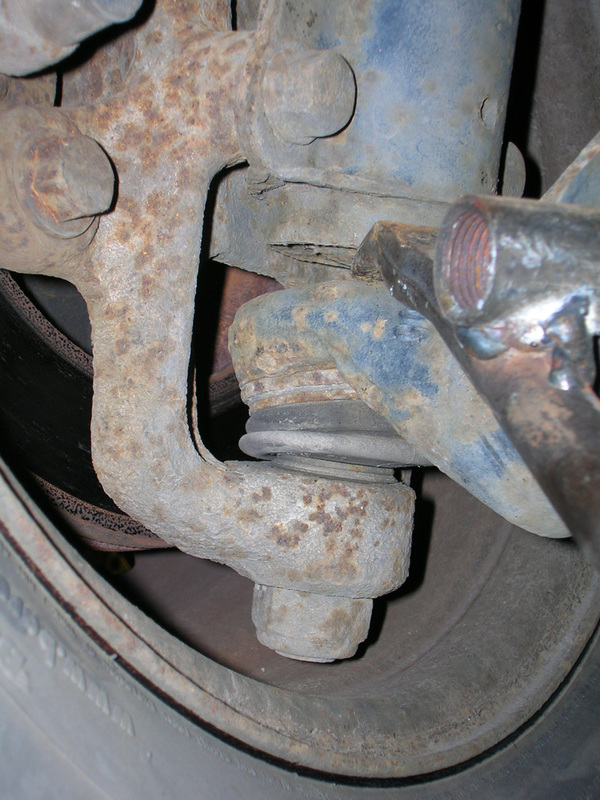
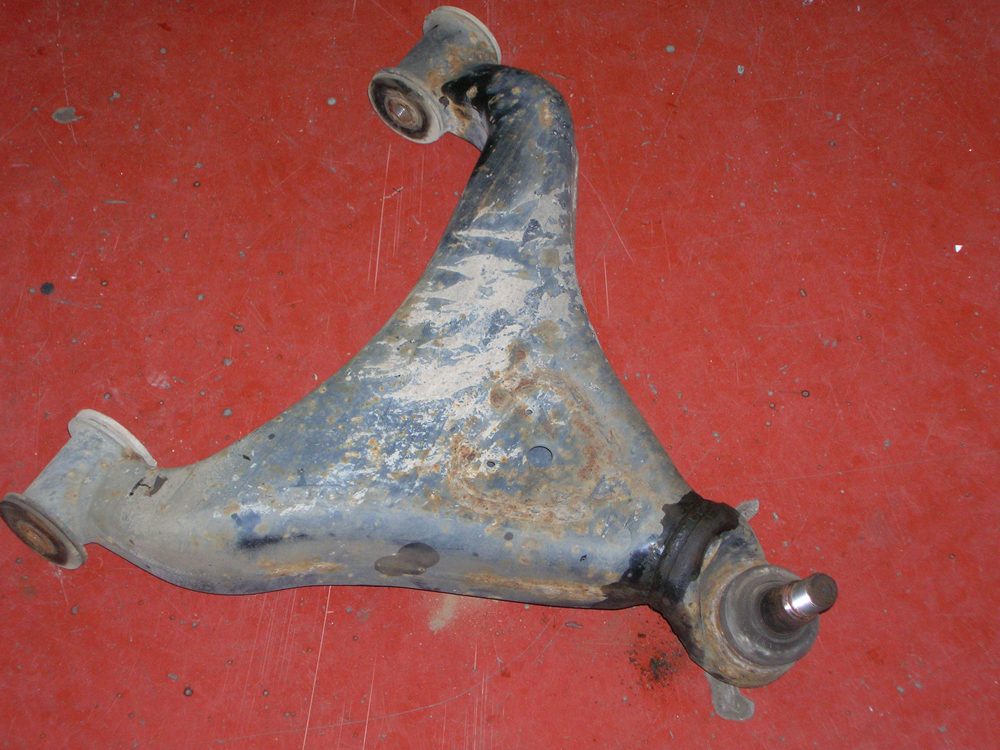
All that now holds the arm is the Anti roll bar drop link plate this is held in place with 3 16mm bolts just remove these allowing the plate to move out of the way . Its a good time to check the drop link bushes at this point and change if needed . The two inner arm bolts can now be removed you will need a 19mm and 21 mm spanner for this job .
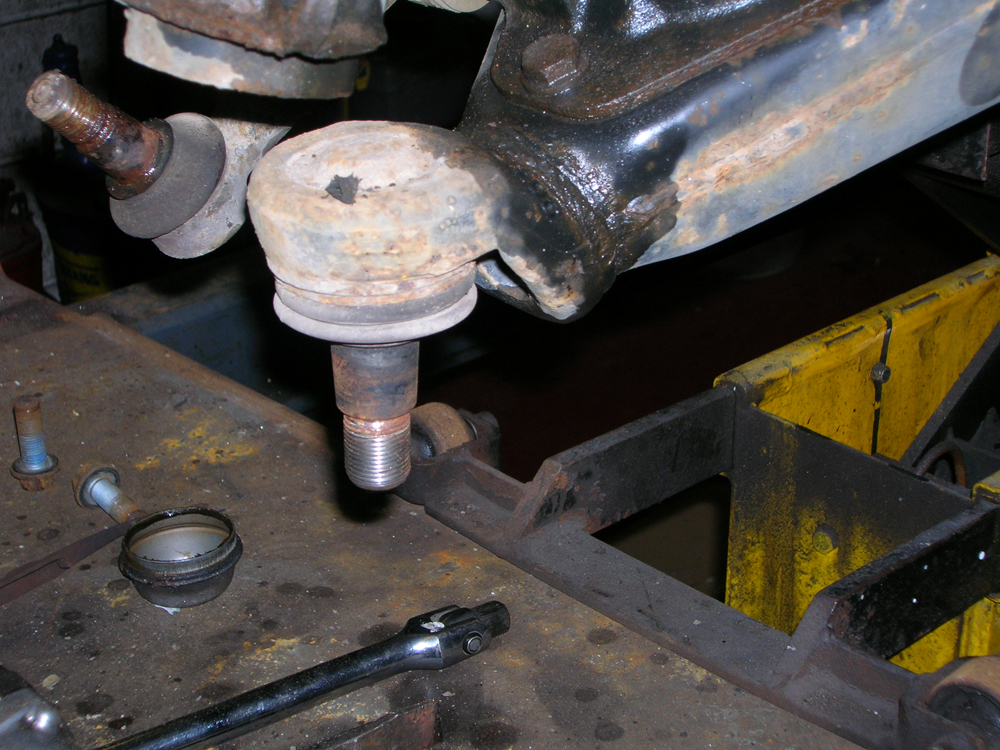
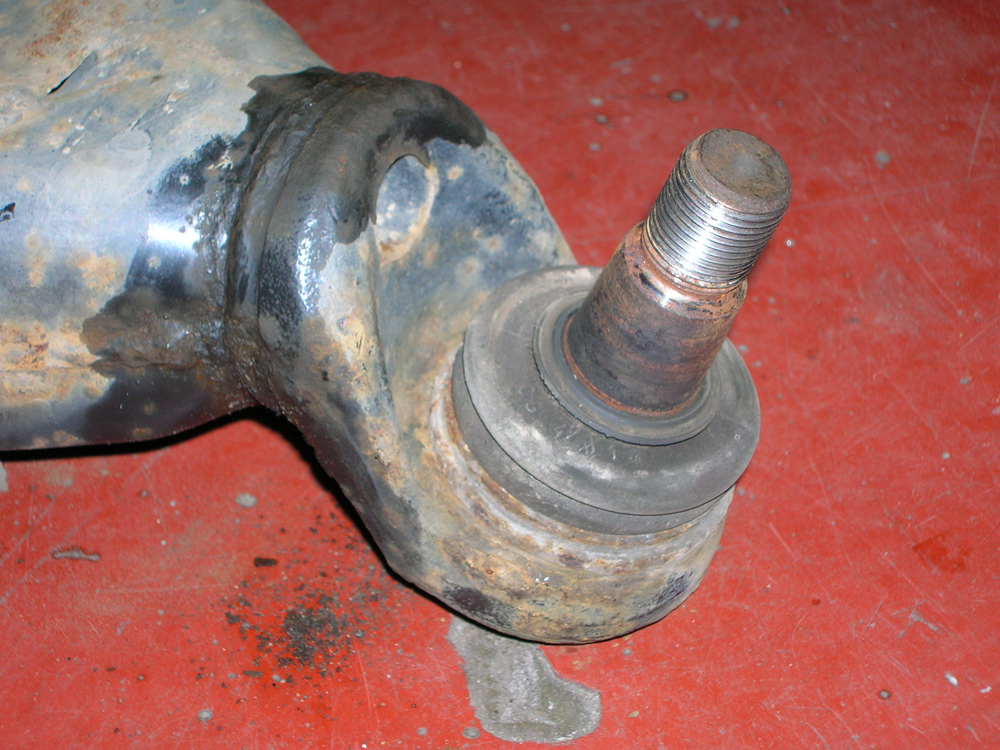
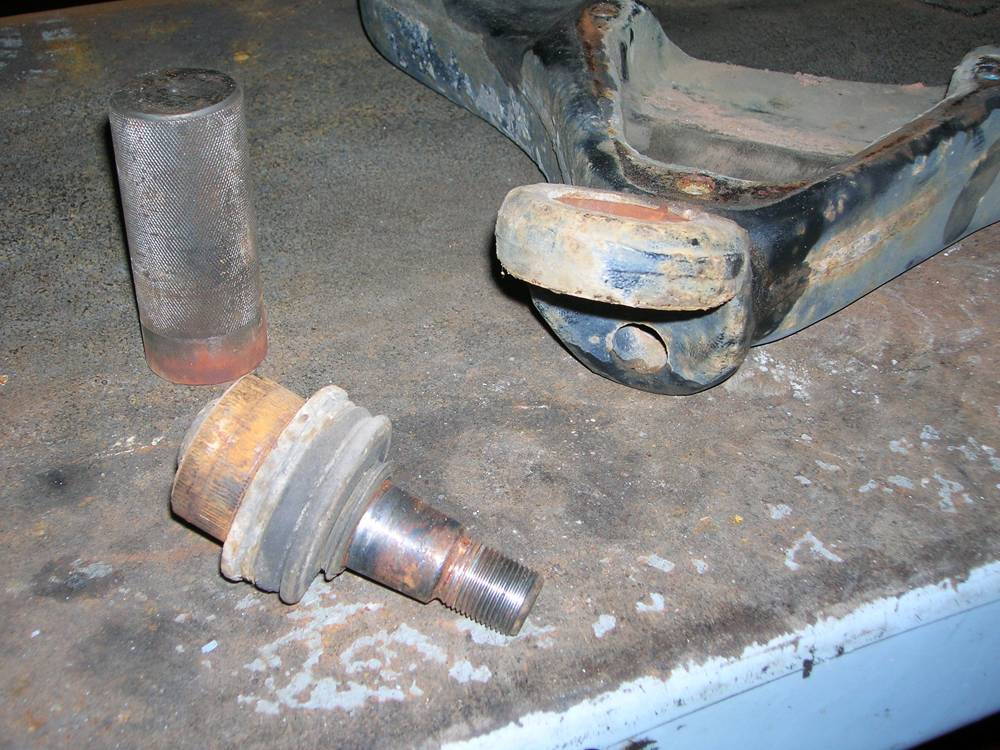
With the arm removed you can now see how worn the ball joint is .
once the joints have been freed off I then remove the four bolts which hold it to the suspension leg and then remove it out of the way ( if you have ABS you will see that the sensor is in the hub so will need to loosen the cable to allow it to come out of the way enough to get the arm off ) .
All that now holds the arm is the Anti roll bar drop link plate this is held in place with 3 16mm bolts just remove these allowing the plate to move out of the way . Its a good time to check the drop link bushes at this point and change if needed . The two inner arm bolts can now be removed you will need a 19mm and 21 mm spanner for this job .
With the arm removed you can now see how worn the ball joint is .
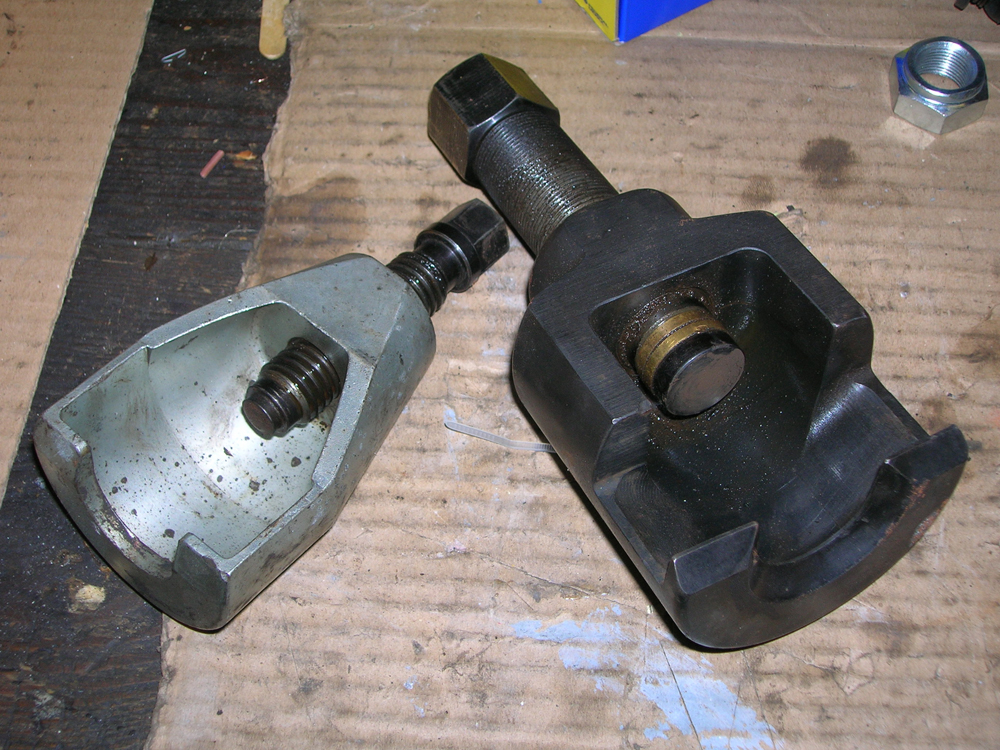
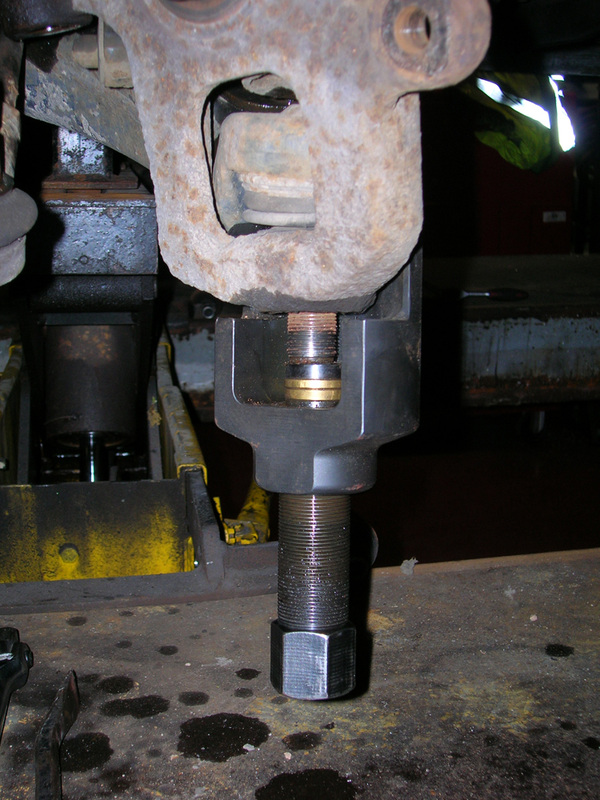
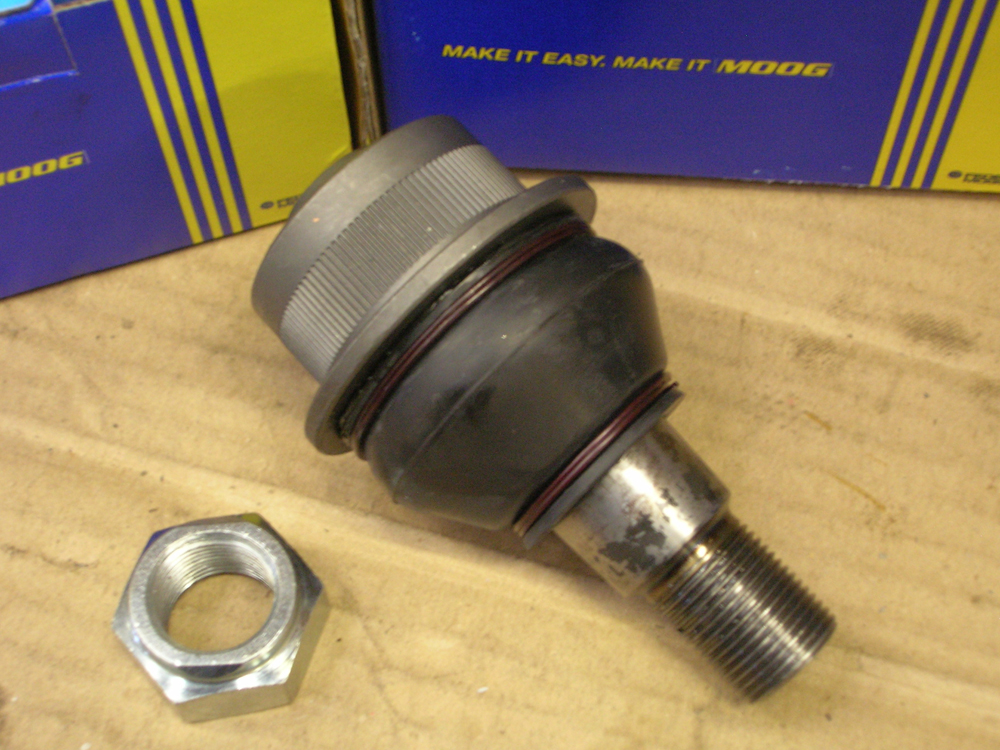
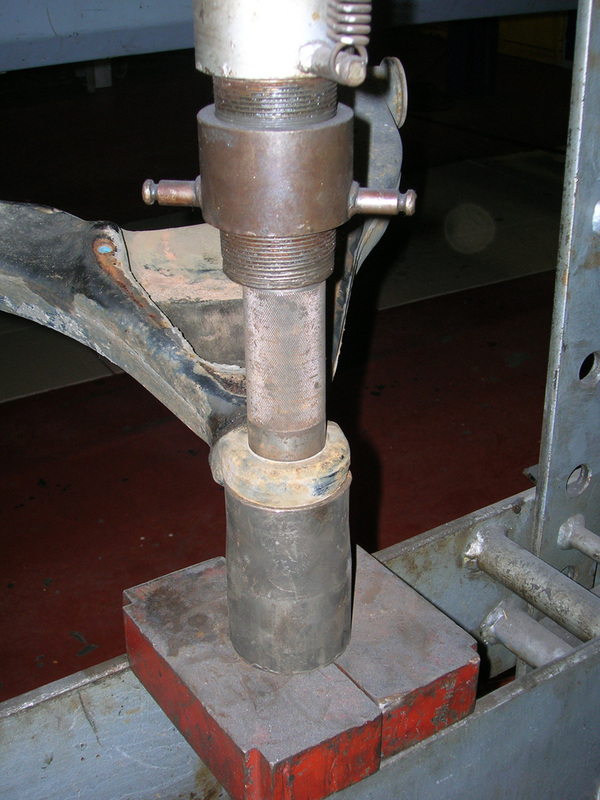
Once the arm is off the next step is to push out the joint I used a press and the official Mercedes press tools they make the job much easier and safer . Setting up the press for removal is straight forward its just a case of pushing the old one out they can be quite tight ,once removed its a case of pushing the new one back ,I used a bit of steam pipe to go over the joint to allow me to press it back in . Once fitted back in arm the arm needs to be refitted back in the vehicle just reverse the removal procedure .
I would suggest the tracking is set after just to check there is no run out mine had been set with worn joints and was out when the new joints had been fitted and suspension had settled so it was adjusted .
I would suggest the tracking is set after just to check there is no run out mine had been set with worn joints and was out when the new joints had been fitted and suspension had settled so it was adjusted .


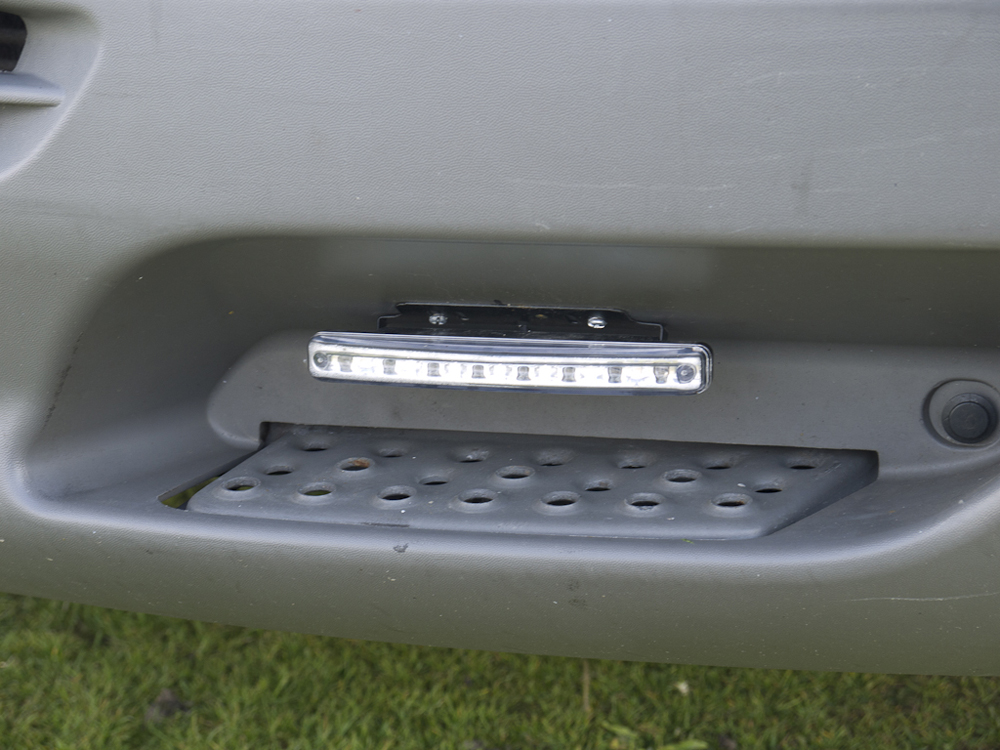
Lighting upgrade.
I have also decided to fit some daylight running lights ,I choose to mount them in the steps in the front bumper , I got them from a shop on ebay the lights were E marked so as to keep within the law ,the rules says daylight running lights must go off or dim when dip headlights are turned on so I I needed to wire up a relay to allow this to happen ,you can buy a relay kit but I managed to wire up a five pin relay which dose the same job and didnt cost me anything as I had a spare one in my tool box .
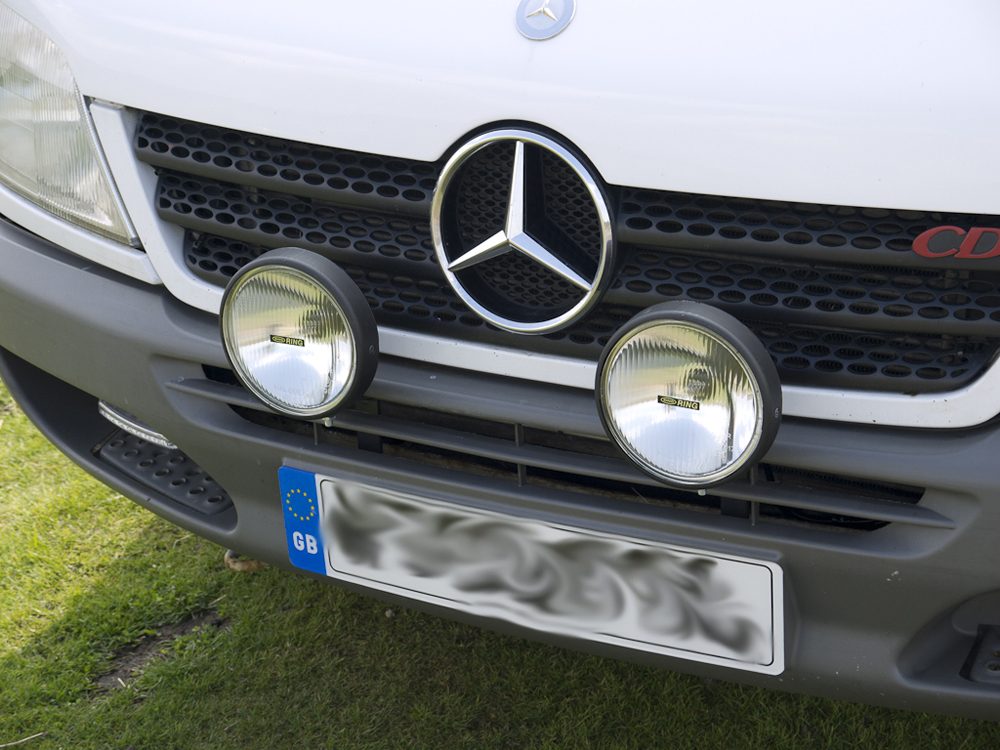
I have also fitted some spot lamps as I think the lights are pretty poor on sprinters , I have made up a lamp bracket and used the bumper mounting holes to secure this behind so only a small bit of the bracket sticks from the bumper this has allowed me to fit my 6 inch spot lights ,I have again wired them up using a relay so they come on with the main beam .
I have also since upgraded to new xenon headlamp bulbs the legal ones which basically use a xenon gas in a H7 bulb they say they provide a brighter whiter light , they seem to have improved the lighting at night but time will tell ,