Blow Air Heating ...
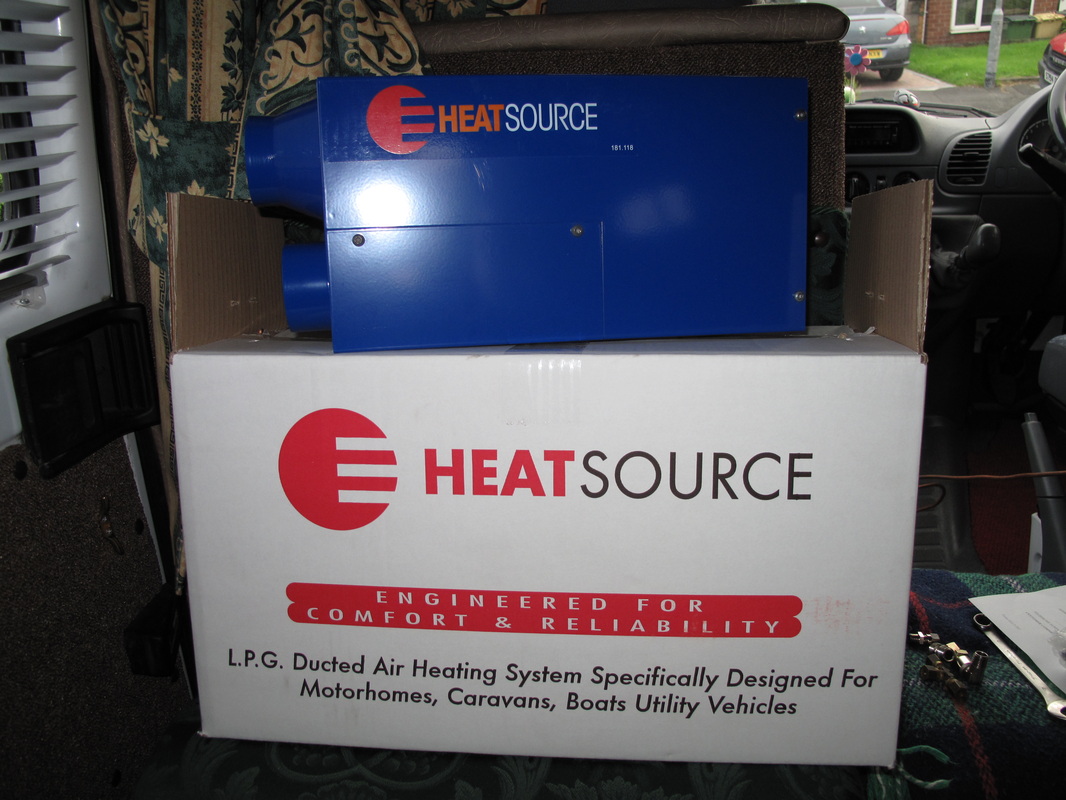
Well we finally got round to installing the heater in the van after much surfing of the Internet and looking through ebay we decided to buy a new Propex Heater as the 2nd hand ones on ebay were going for silly prices and it wasn't much more to buy a new one . We got ours from Jacksons Leisure Supplies and their service was excellent the unit arrived the day after buy courier and was well packaged first class service and would recommend them to anyone .
After unpacking the unit and a read through the instructions we set about deciding were to fit it, we choose one of the seat boxes so checked under the floor for anything that might be in the way like chassis rails or fuel tank everything was fine as there was a large void under the floor .
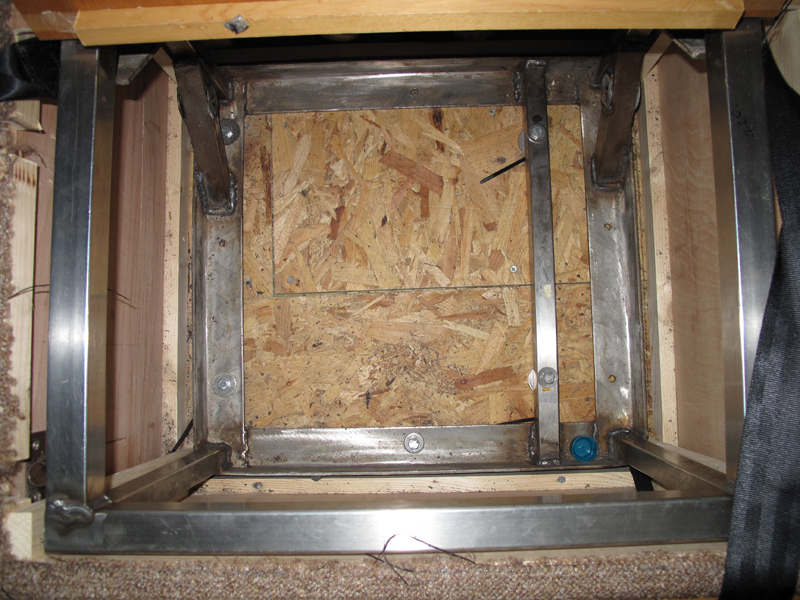
In the box you get a template to mark out the position of the exhaust holes which need to be cut out using a 40mm hole cutter . A couple of pilot holes later we had drilled through the floor and trial fitted the unit ,it fitted a treat and left plenty of room in the box after ,we plan to make a false floor so we don't cover the unit up with out boot bags and other stuff under the seat and so allow air round it .
After unpacking the unit and a read through the instructions we set about deciding were to fit it, we choose one of the seat boxes so checked under the floor for anything that might be in the way like chassis rails or fuel tank everything was fine as there was a large void under the floor .
In the box you get a template to mark out the position of the exhaust holes which need to be cut out using a 40mm hole cutter . A couple of pilot holes later we had drilled through the floor and trial fitted the unit ,it fitted a treat and left plenty of room in the box after ,we plan to make a false floor so we don't cover the unit up with out boot bags and other stuff under the seat and so allow air round it .


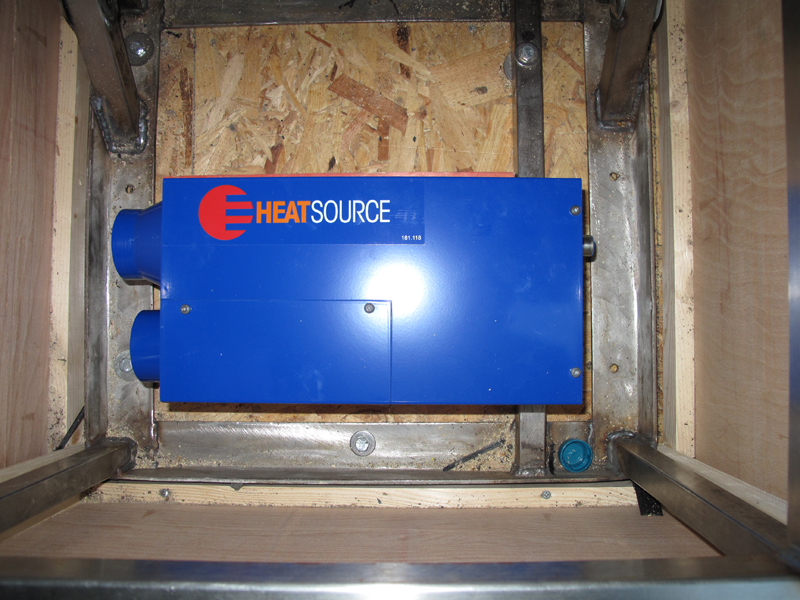
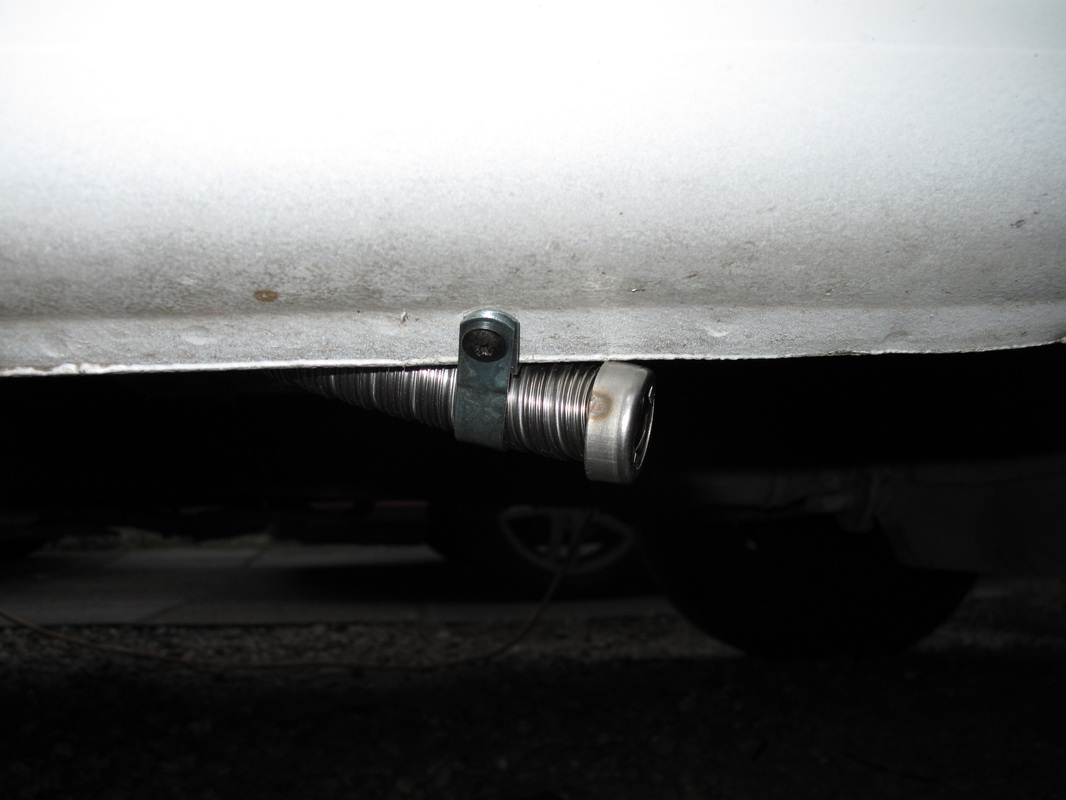
After a trial fit we fitted the exhaust and the intake tubes making sure they were nice and tight I used a gas paste to make sure they were sealed so no chance of any fumes coming into the van when it was working ,both pipes are then fed through the floor and fastened up one with the clips supplied .
The gas pipe connection supplied was an 8mm but the pipe in our van was 6mm but it says you can use an adapter to reduce it to 6mm this is what we did all the fittings were tightened and each one has gas tape on the threads to make sure there were no leaks . The position of the heater has ment that the pipe has been routed under the floor I plan to lag this for winter but will end up using propane if we find we have trouble with the cold .
The gas pipe connection supplied was an 8mm but the pipe in our van was 6mm but it says you can use an adapter to reduce it to 6mm this is what we did all the fittings were tightened and each one has gas tape on the threads to make sure there were no leaks . The position of the heater has ment that the pipe has been routed under the floor I plan to lag this for winter but will end up using propane if we find we have trouble with the cold .

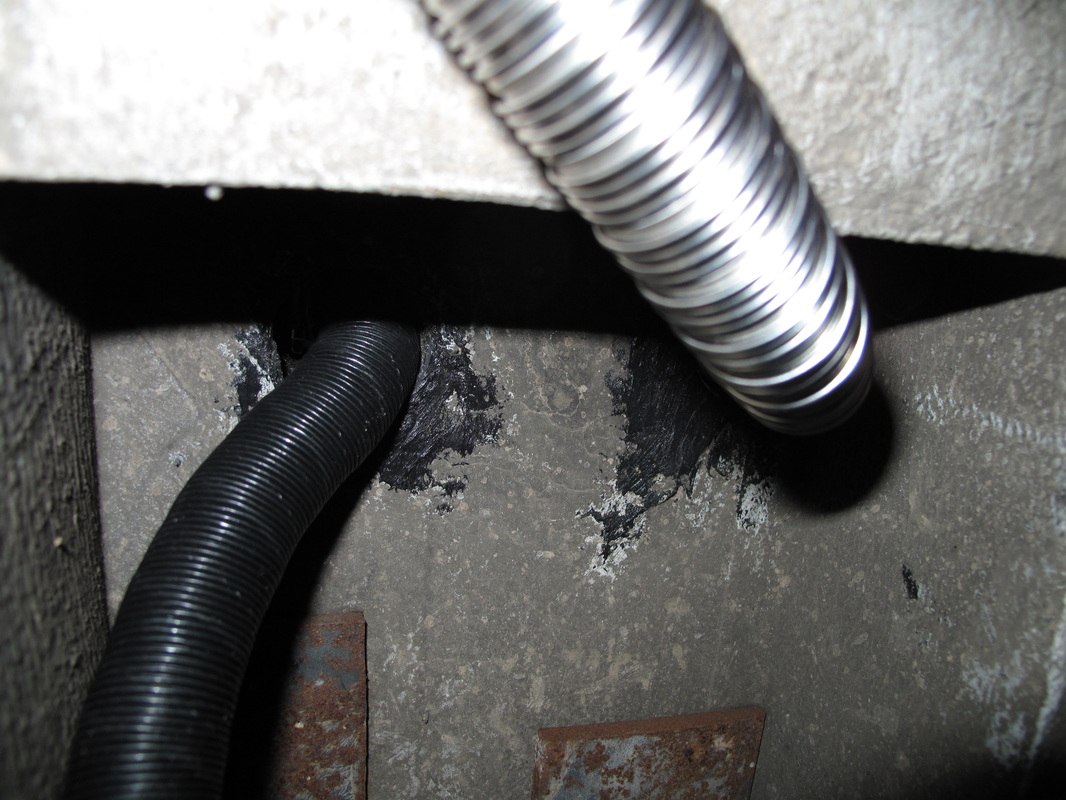
The routing of the gas pipe turned out to be a pain as my first routing didnt go according to plan I didnt want a join under the floor so struggled fitting the pipe trying to get it following the chassis to the gas locker at the rear but I must have kinked the pipe which later was to restrict gas flow ,so I decided to go across the van with it and up under the kitchen unit and into the main gas supply . After making sure all the joints are tight i sprayed with strong soapy leak solution and watch for any gas bubbles around the joints of the pipe . The unit comes with a thermostatic control with a rocker switch this is fitted between waist and shoulder height we found a suitable spot and routed the wire again the instructions tell you how to wire it.
The heater also needs a 12v supply with suitable earth to complete the installation both wiring harnesses are supplied and simple to fit .
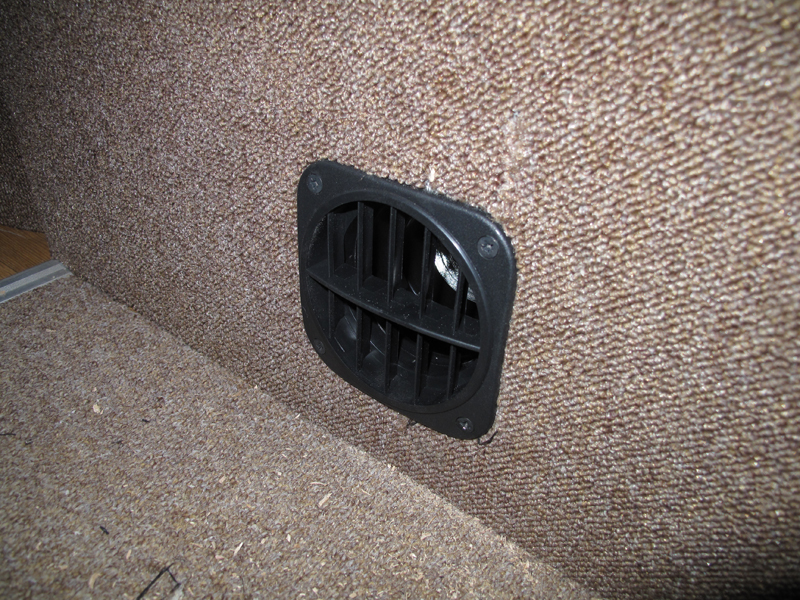
The vent holes were cut into the seat bases and the air duct trimmed ,only a short length was needed so we wont loose much heat in the pipe length,at a later date we plan to possibly fit another pipe to it and run this to the bathroom but we will try it with one first.
The heater also needs a 12v supply with suitable earth to complete the installation both wiring harnesses are supplied and simple to fit .
The vent holes were cut into the seat bases and the air duct trimmed ,only a short length was needed so we wont loose much heat in the pipe length,at a later date we plan to possibly fit another pipe to it and run this to the bathroom but we will try it with one first.


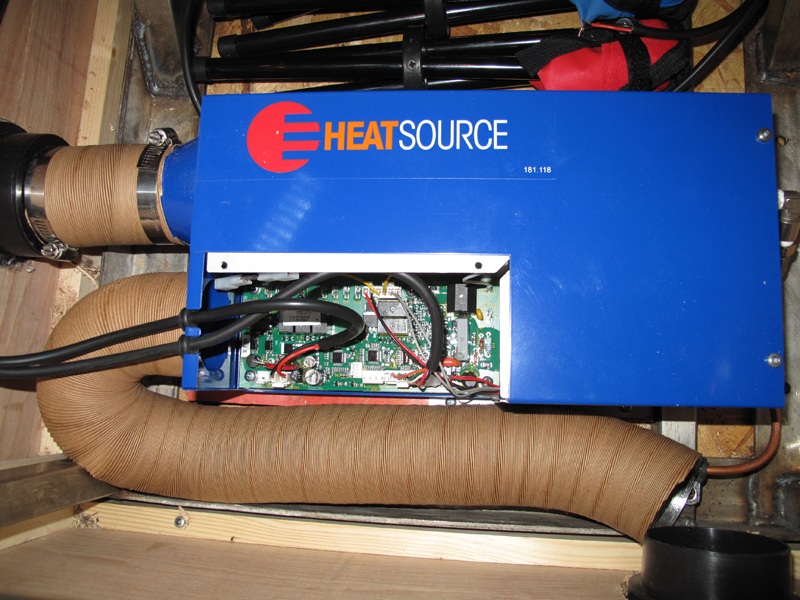
After a check of all the pipework we tried to start the unit for some reason it wouldn't fire and flashed a code 2 which ment there was a restriction or gas flow problem this is when I found the kinked pipe which was restricting gas flow ,after reworking the pipe as described above and checking again with soap we tried again bingo it fired up and got warm and worked a treat ,its surprising how much heat this unit kicks out after setting the thermostat and running a few tests its seems to be working fine .
Roll on winter now so we can try it !!!
Roll on winter now so we can try it !!!
